This is the perfect guide for anyone who wants to start a sourdough starter from scratch with absolutely no fancy tools. I’m taking you along on my entire journey with my new starter, Pip, and I’m not leaving anything out.
I’ll be sharing every single detail including the room temperature, the time, the smell… everything!
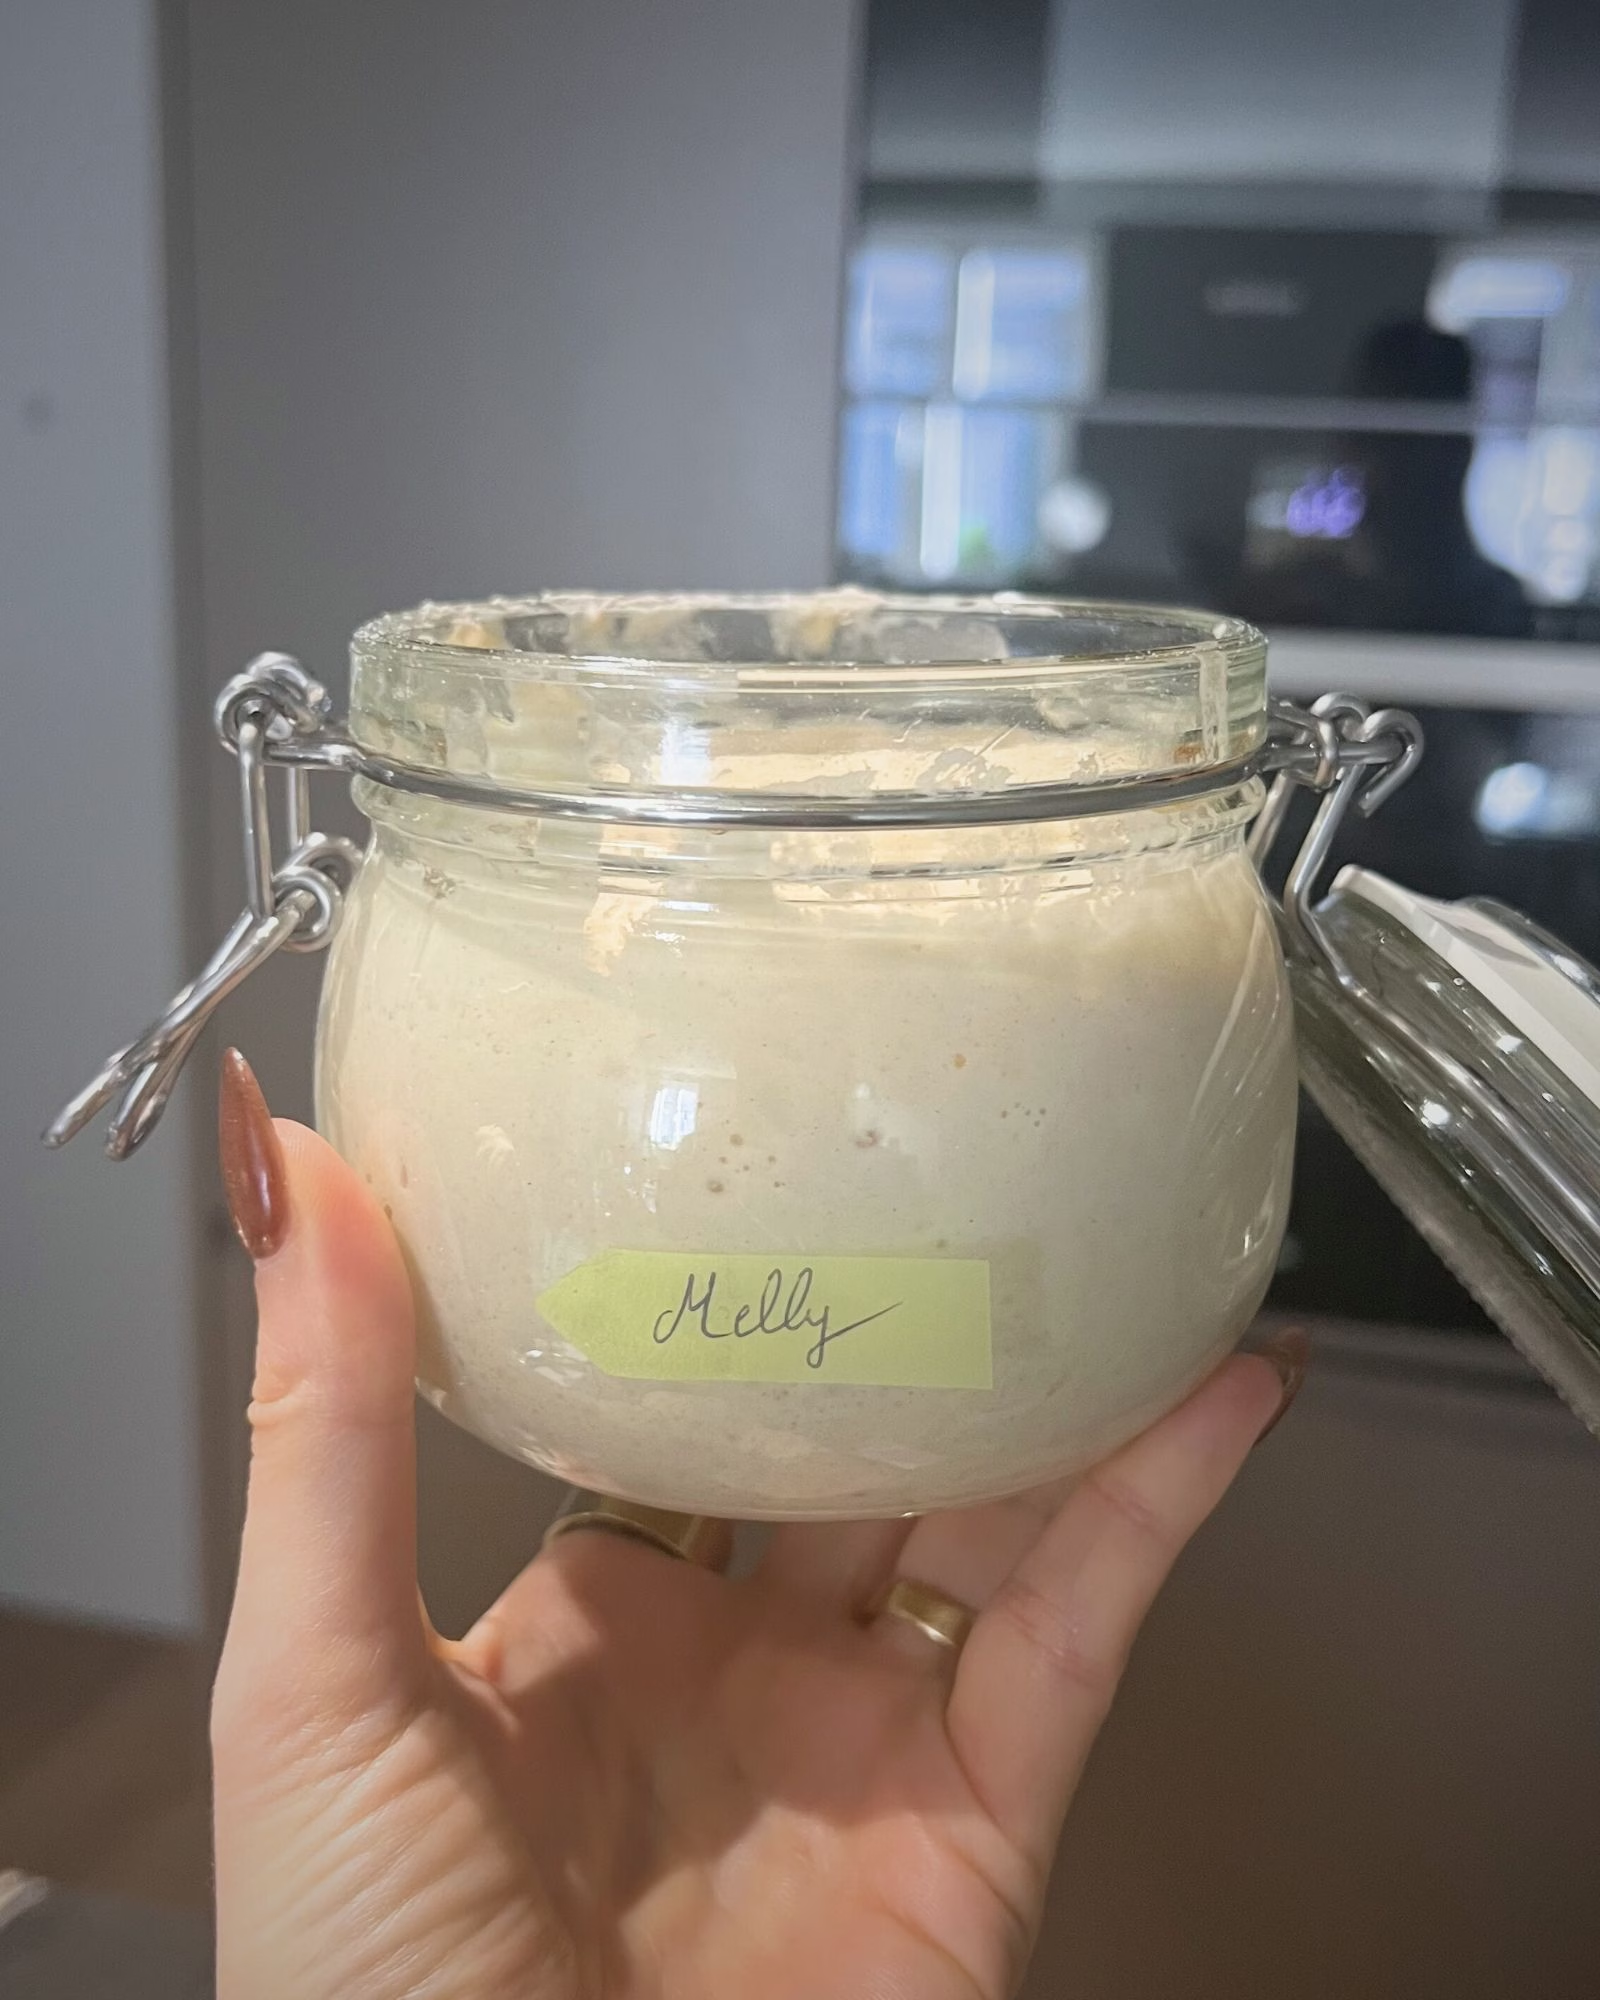
👇🏼 Below is my starter “Melly” the day she got active!

Published: March 4, 2026 by Pamela.
This post may contain affiliate links. Please read our disclosure policy.
Lately, I’ve been obsessed with sourdough. My family has been following along with every photo and loaf I’ve shared, and naturally, they started asking: “How do I start my own?” and honestly, I didn’t have a clear answer.
So, I decided to start a brand-new starter from scratch and I’m taking all the notes as if you were here with me in my kitchen: the exact grams, the room temperature, the time of day, the changing smells, and the “nothing is happening” moments.
This is a no tools guide, you will need flour, water, and a jar. If you have a scale then good! If you don’t, I will also tell you the consistency you need to look for so you can eyeball it.
Index:
Ingredients to make a sourdough starter:
To make a sourdough starter, you only need two ingredients: flour and water. I could talk to you about the “best” types of flour, but to keep things simple, I am making my starter with all-purpose flour. Yes, just regular all-purpose flour!
Honestly, this is the most common type of flour I find here in Portugal. I can find bread flour, which is technically better, but it is not as common or easy to get. I want to show you that you can do this with what you already have in your kitchen.
Nevertheless, let’s talk about the different types and how they react:
- All-Purpose Flour: This is what I am using for this guide. It is the most accessible flour, especially here in Portugal. It creates a reliable starter, but because it has less protein and minerals than bread or whole grain flours, it might take a few extra days to really “wake up” and show big bubbles.
- Bread Flour: Bread flour has a higher protein content, which helps create a stronger structure for those bubbles to grow. It’s “better” technically, but as I mentioned, it’s not always the easiest to find in every local shop. If you have it, use it, but don’t worry if you don’t.
- Whole Wheat or Rye Flour: These flours are like “superfood” for wild yeast. They contain more nutrients and minerals from the outer layer of the grain, which usually makes the fermentation happen much faster. You might see activity in 24 hours with these, whereas all-purpose might take 48 to 72 hours.
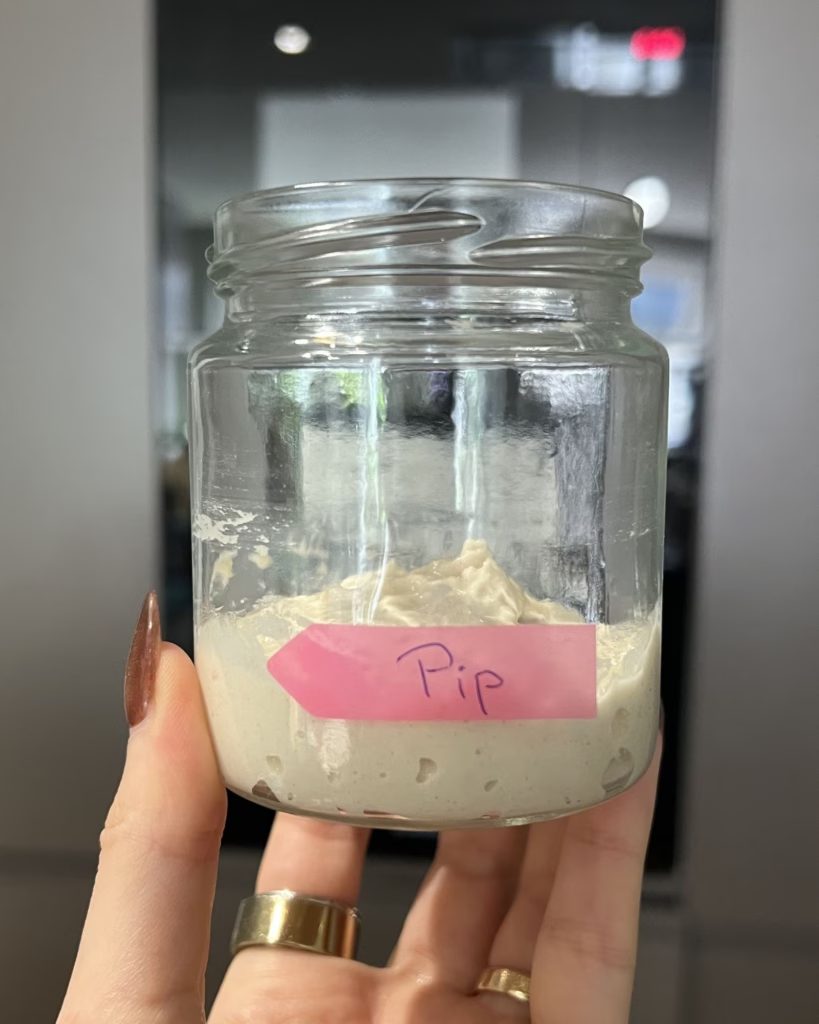
Meet Pip: My Sourdough Investigation
I’m calling my starter Pip. I happened to start it while reading A Good Girl’s Guide to Murder, and since I’m investigating every little bubble and smell, the name just fits perfectly.
Here is exactly what has happened with Pip so far. Notice the room temperature; it’s a bit cool (around 20°C), so things might move a little slower than they would in a warm bakery.
DAY 1: The Start
- Time: 1:30 PM
- Room Temperature: 19.9°C
- The Mix: 25g All-Purpose Flour + 25g Water
You want to mix it thoroughly until it forms a thick, shaggy paste. Make sure there is no dry flour left at the bottom. Once it’s mixed, scrape down the sides of the jar with your spoon. The mark your starter with anything, this is the only way you will be able to tell if the starter moved. Add the lid but don’t close it.
No Scale? How to Eyeball It:
If you don’t have a scale yet, don’t worry. You can still start today.
- The Goal: You are looking for the consistency of thick, sticky pancake batter. You will look for this consistency for each day.
- Use roughly 1 heaping tablespoon of flour and 1 flat tablespoon of water.
- If it’s runny like soup, add a tiny bit more flour. If it’s so stiff you can’t stir it, add a few drops of water. It should be thick enough that if you tilted the jar, it would move very slowly.

DAY 2: Nothing happens, needs feeding
Pip is currently in the “quiet phase.” It still smells just like wet flour, and there hasn’t been any movement or bubbles yet.
- Time: 1:42 PM
- Room Temperature: 19.7°C
- Status: Smells like flour. No movement or bubbles.
- The Feed: 25g Starter (everything in the jar) + 25g Flour + 25g Water.
Since there was no activity, I didn’t discard anything today. I just added another “meal” to the jar (I added 25g of flour and 25g of water). Mix it well until that thick, shaggy paste forms again. Scrape those sides down! Add the lid but don’t close it, then adjust the marker.

DAY 3: The false rise
Today is the day your starter will try to trick you. When you check your jar, you might see that it has doubled in size and is showing off a few beautiful bubbles. You’ll be tempted to think you’re a natural and that it’s already time to bake.
Look away. This is what we call “false hope.” It’s a burst of early bacterial activity, but your starter is still far from being ready to actually leaven bread. The balance of yeast and good bacteria hasn’t stabilized yet.
- Time: 1:11 PM
- Room Temperature: 20.4°C
- Status: Doubled in size. Smells like nothing (like wet flour).
- Action: Do nothing.
DAY 4: The bad smell
If Day 3 gave you false hope, Day 4 is here to bring you back to reality. When I checked on Pip today, she had maintained her doubled size, but the smell… well, it wasn’t great. It didn’t smell rotten bad, just bad. This is the stage where the “bad” bacteria are having their final party before the acidity of the starter rises enough to kill them off and let the good yeast take over.
Here’s what to do on day 4:
This is the part that is going to hurt your heart: you need to throw away most of your starter. You only need to keep about 25g (roughly one small scoop) in the jar. Yes, it seems like a huge waste, but it is what it is. It is extremely important that you do not use this discard for crackers or any other recipes yet. Since Pip is currently full of those “bad” bacteria we talked about, this discard belongs in the bin, not in your food. Then I added about 40g of flour and 20g of water, this is to tell you that even with a scale I eyeball it. Remember, a thicker starter is more forgiving.
- Time: 12:10 PM
- Room Temperature: 20.3°C
- Status: Maintained double size, but smells bad.
- The Feed: Kept 25g Starter + 40g Flour + 20g Water.
To Be Continued…
That is where Pip stands for now. She’s thick, she’s a little bit smelly, and she’s currently in the middle of a battle between the good yeast and the “bad” bacteria. It’s a bit of a cliffhanger, but that’s the reality of making sourdough from scratch, especially when you’re doing it with no fancy tools and just basic all-purpose flour.
I’m leaving Pip alone for now to do her work. I’ll be back tomorrow with a full update for Day 5 to see if the smell has improved and if that new, thicker consistency is helping her rise.
Check back tomorrow to see if the investigation takes a turn for the better!


Leave a Reply