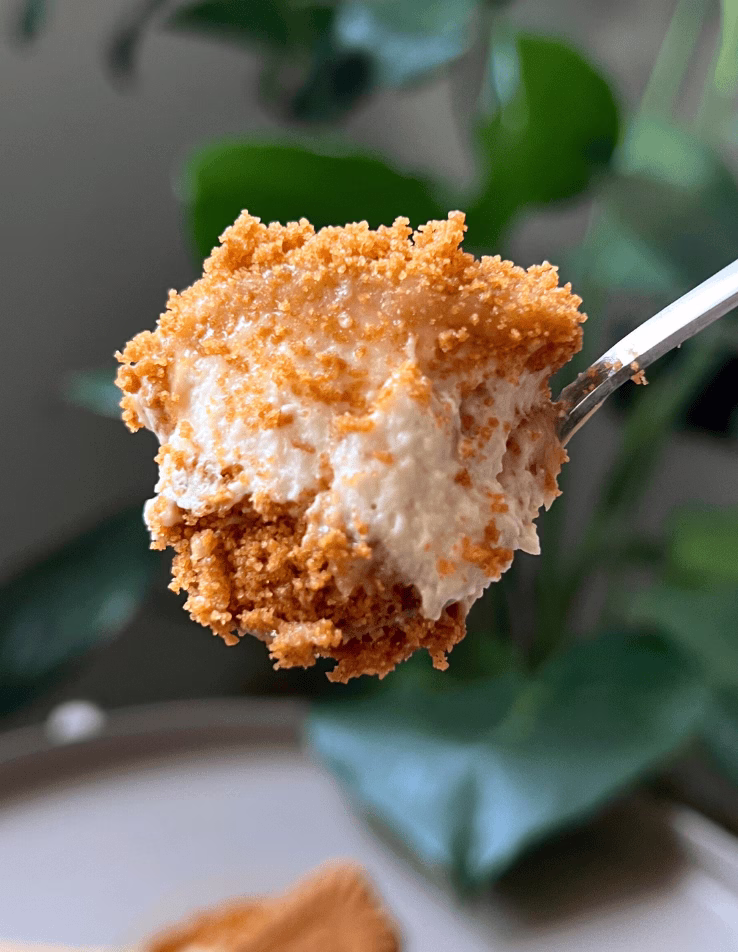
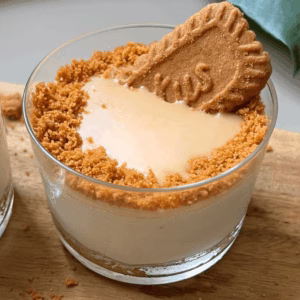
No-bake Biscoff cheesecake cups made with homemade 3-ingredient Biscoff spread. Only a few ingredients, no oven, and perfect for summer days.

Published: July 6, 2025 by Pamela. Updated on September 27, 2025.
This post may contain affiliate links. Please read our disclosure policy.
After making my Oreo cheesecake cups, I knew I had to follow them up with other cheesecake flavors. At the top of the list? Biscoff. (Rumor has it, Nutella might be next 👀.)
I love cheesecakes, and I really love when it’s a no bake version, especially in the summer and especially during a heat wave. No oven, no problem.
A while back, I shared my 3 ingredient Biscoff spread, and I’ve been making it every time I need it in a recipe. You can absolutely use the store bought version for this, but my recipe takes 3 ingredients, 5 minutes, and costs less; so it’s a win for me.
If you’ve made any of my recipes lately, you probably know I’ve been all about keeping things simple; I mean, I’ve always focused on simple recipes but now I’m taking it a step further. Few steps, few ingredients, and things you likely already have. You won’t catch me listing something like yuzu extract or freeze-dried cloudberries, I really want you to be able to find the ingredients in any supermarket.
That being said, let me show you how I made these amazing Biscoff cheesecake cups at home!
Ingredients to make Biscoff cheesecake cups:
- Biscoff Cookies: These make the crust. You’ll want the classic Lotus Biscoff cookies for that deep caramelized flavor. Any speculoos cookie would work if you can’t find the original, but Biscoff is really the star here.
- Unsalted Butter: Melted butter binds the cookie crumbs for the base. I like using unsalted so I can control the saltiness.
- Whipping Cream: This helps create a light, mousse-like texture. You want to use 30 to 35% whipping cream and it has to be cold so it whips well. Don’t substitute with milk or coffee cream, it won’t hold.
- Cream Cheese: Use full-fat cream cheese for the best texture and taste. I don’t recommend using low-fat, it can make the filling watery.
- Vanilla Extract: A little vanilla brings out the flavors in the filling.
- Granulated Sugar: I use regular white granulated sugar here. Once mixed in, the granules melt into the filling, so you won’t feel a thing.
- Biscoff Spread: I used my 3-ingredient homemade Biscoff spread, you can absolutely use the store-bought version if that is something that is easily accessible to you.
- White Chocolate: This is for the topping. I made a quick white chocolate ganache and added Biscoff spread to it. It’s more of a gourmet touch than just spreading the Biscoff on top; but that’s one of the reasons. The second reason is, my homemade Biscoff spread doesn’t melt well on its own, the texture becomes off. So, if you are using store-bought spread, you can absolutely skip the chocolate ganache and just melt a bit of spread in the microwave and pour it on top.
Measurements are posted in the recipe card below the instructions.
🎥 How to make Biscoff cheesecake cups:
How to make Biscoff cheesecake cups recipe:
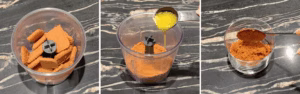
1. To make the base: blend the Biscoff cookies until fine. Add melted butter and mix until it looks like wet sand. Scoop a bit into the bottom of each cup. No need to press it down too much, these are cheesecake cups, not a solid cake base.

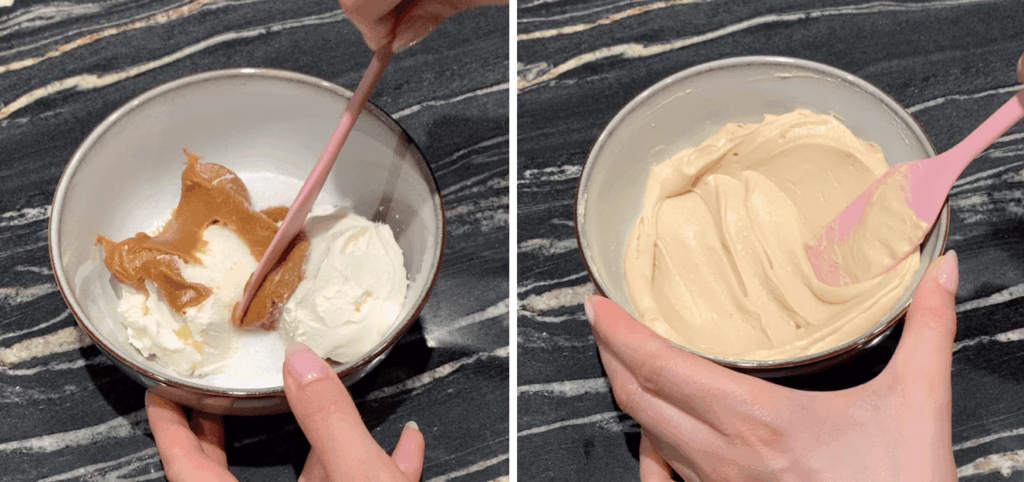
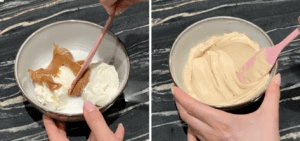
2. To make the filling: In a small bowl, add the cream cheese, sugar, vanilla, and Biscoff spread. Mix with a spatula or spoon until everything is smooth and well combined. Set aside.
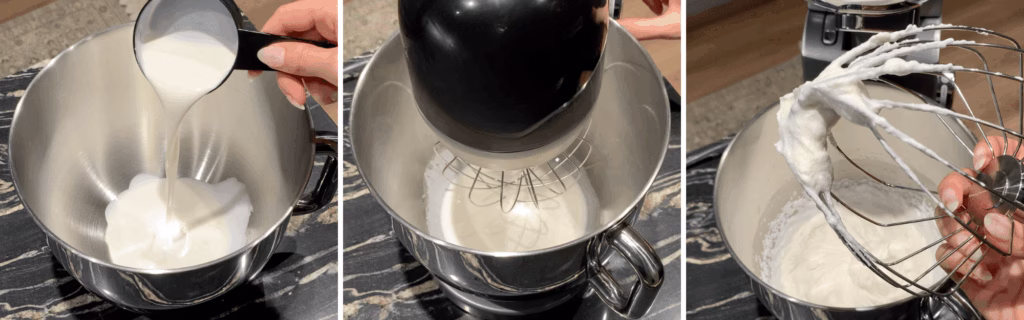
3. In a separate bowl, pour in the whipping cream. Start whipping on low, then slowly increase to high. Whip until stiff peaks form, that means when you lift the whisk, the cream stands up and holds its shape. Be careful not to over-mix, or it can turn grainy and start to separate.
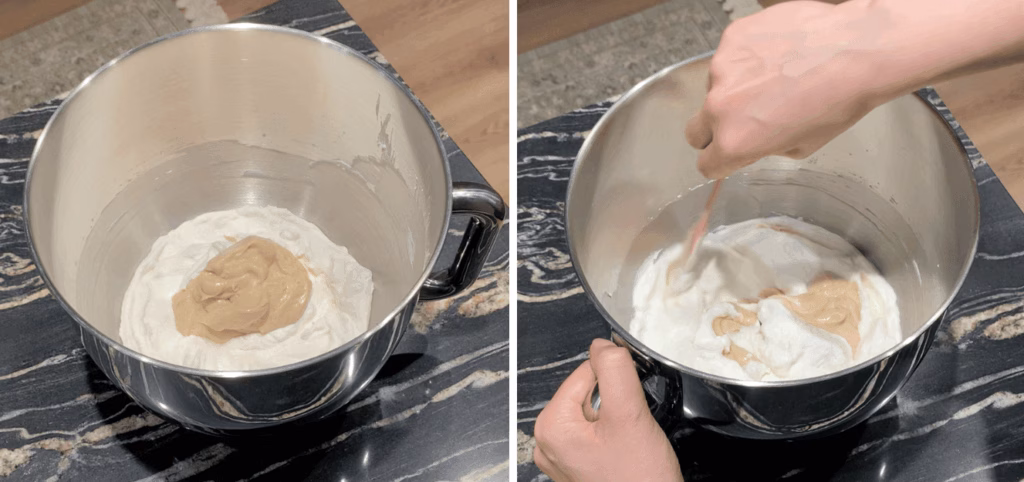
4. Add the cream cheese mixture to the whipped cream. Gently fold with a spatula just until combined. Don’t over-mix, you want to keep the mixture light and fluffy.
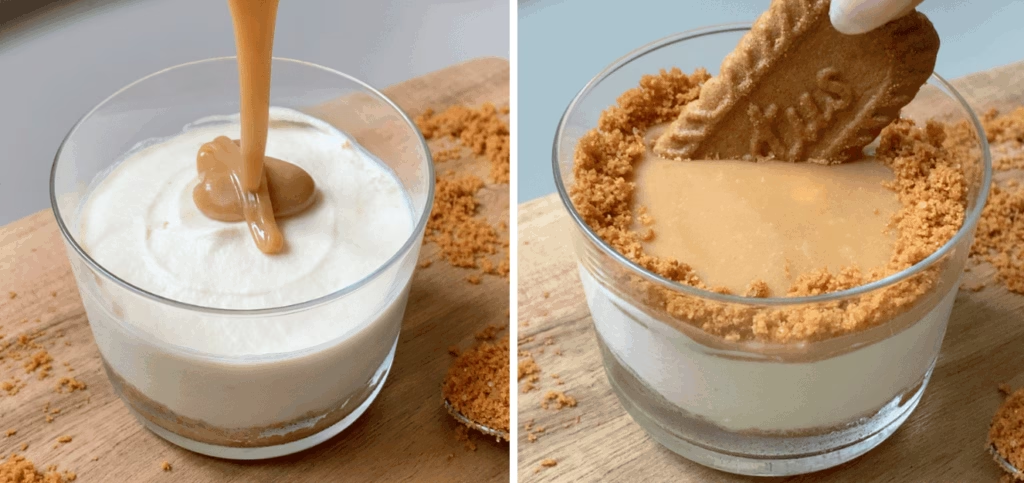
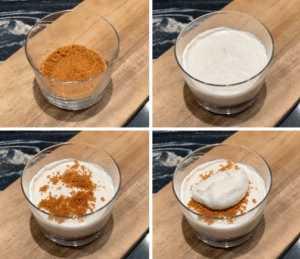
5. Scoop the cheesecake filling into your cups. I did a little cream, a sprinkle of cookie base, then more cream. The layering is totally up to you. You can even mix in some cookie chunks if you like a bit of crunch inside.
Once done, place the cups in the fridge for at least an hour to chill and set.

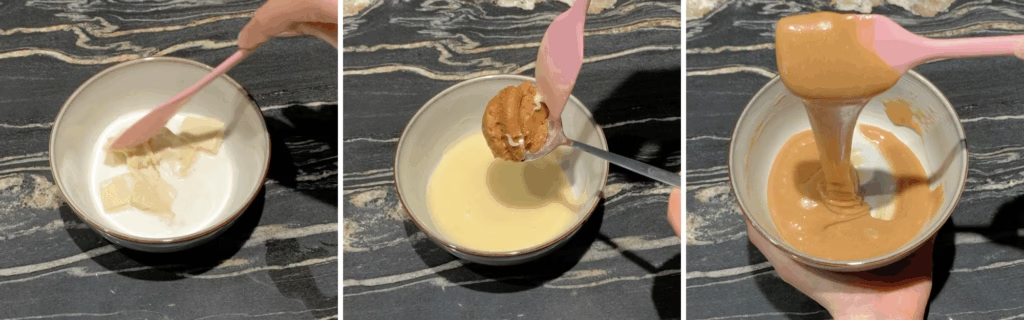
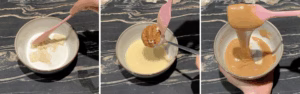
6. To make the ganache: in a microwave-safe bowl, combine the white chocolate and cream. Microwave for 30 seconds, then stir until smooth and fully melted. If needed, microwave again in 15-second intervals, don’t overheat.
Once smooth, stir in the Biscoff spread. Mix until everything is combined and silky. Let the ganache cool to room temperature, and make sure it isn’t hot when you add it to the cups.
7. Spoon the ganache over the top of each cheesecake cup, swirl the cup around to smooth it out. Decorate however you like!
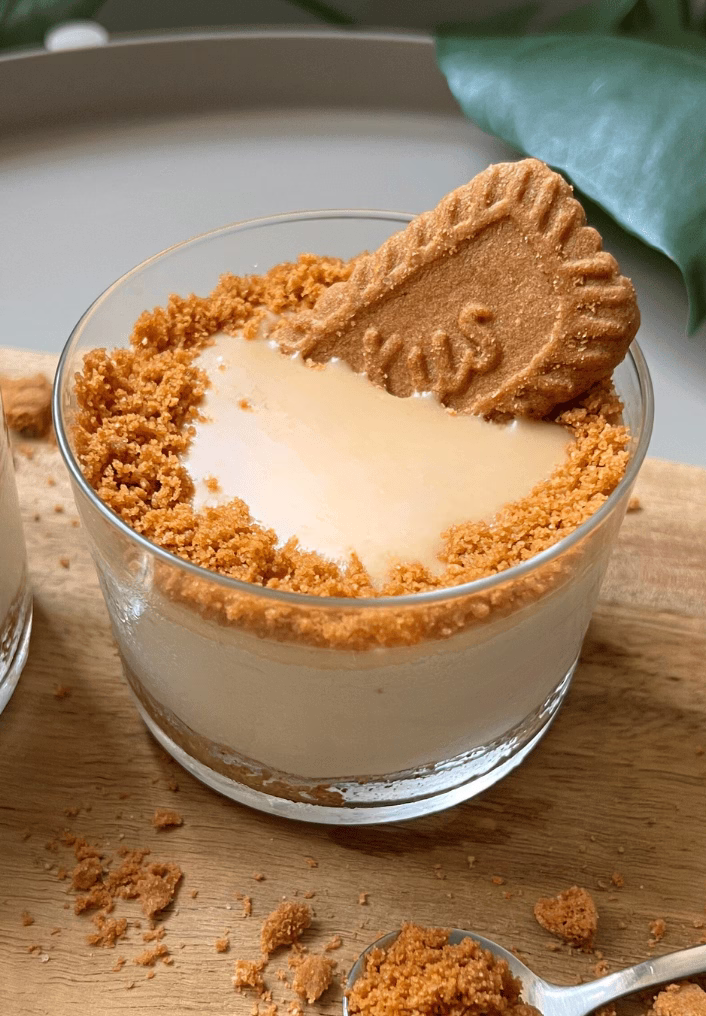
You can enjoy them right away, or chill them in the fridge for later. If you keep them in the fridge overnight, I highly recommend removing them 5 minutes before serving, the texture of the ganache will be creamier and better!
Frequently Asked Questions:
Can I use store-bought Biscoff spread instead of homemade?
Yes, absolutely. I used my 3-ingredient homemade version, but store-bought works perfectly too, especially if you want to skip the ganache on top and just add melted Biscoff spread (because my recipe does not melt well).
What does stiff peaks mean in baking recipes?
That’s when you lift your whisk or beater and the whipped cream stands up firmly without folding over. It should hold its shape but still look smooth.
Can I make Biscoff cheesecake ahead of time?
Yes. These are perfect for making a few hours ahead or even the day before. Just keep them covered in the fridge.
Can I add more cream cheese to this cheesecake recipe?
Yes, if you prefer a higher ratio you can, I wanted these to be airy and fluffy so i added half the amount of cream in cream cheese, you can go for ⅔ of a cup of cream cheese and 1 cup of cream like in my Oreo cheesecake recipe!
Can I freeze Biscoff cheesecake?
I don’t recommend freezing these. The texture can change once thawed, especially the cream cheese layer. Also, this recipe is small, it makes 4 servings so they’ll be gone before you know it.
Can I turn these cups into a Biscoff cheesecake cake?
Not exactly. The measurements here are meant for individual cups, so the base and filling won’t hold up well as a full cheesecake. To make a proper cake version, you’d need to adjust the ratios, especially the base, which would need more butter to hold together when sliced. Let me know in the comments if a cake version is something you want!
Tips to store Biscoff cheesecake cups so they stay fresh:
Keep the cheesecake cups covered in the fridge. They stay fresh for about 3 to 4 days. If you’re adding toppings like whipped cream or crushed cookies, it’s best to add them just before serving so they stay fresh and pretty.
⭐️ If you tried this recipe, be sure to leave a rating and share your thoughts in the comments below. I’d love to hear your feedback!
No-Bake Biscoff Cheesecake Cups
Ingredients
For the base:
- 10 Biscoff Cookies
- 1 Tbsp Unsalted Butter
For the filling:
- 1 Cup Whipping Cream
- ½ Cup Cream Cheese
- 2 Tbsps Biscoff Spread
- ½ tsp Vanilla Extract
- 2 Tbsps Granulated Sugar
For the ganache:
- 40 g White Chocolate
- 15 g Whipping Cream
- 2 Tbsp Biscoff Spread
Instructions
For the base:
- Blend the Biscoff cookies until finely crushed. Add the melted butter and mix until the texture looks like wet sand. Spoon some into the bottom of each cup. There’s no need to press it down firmly since these are individual cups, not a solid cake.
For the filling:
- In a small bowl, combine the cream cheese, sugar, vanilla, and Biscoff spread. Mix everything together using a spatula or spoon until the mixture is smooth and fully blended. Set it aside for now.
- In another bowl, pour in the cold whipping cream. Start whipping on low speed, then slowly increase to high. Keep going until stiff peaks form, meaning the cream stands up when you lift the whisk. Be careful not to over-whip or it can turn grainy.

- Add the cream cheese mixture to the whipped cream. Gently fold it in with a spatula just until everything is combined. You want the texture to stay light and airy.

- Spoon the cheesecake mixture into your cups. You can layer however you like. I added some cream, a sprinkle of the cookie base, then more cream. You can also add chunks of cookies if you want extra crunch. Place the cups in the fridge for about an hour to chill.
For the ganache:
- To make the ganache, add white chocolate and cream to a microwave-safe bowl. Heat it for 30 seconds, then stir until the chocolate is melted and smooth. If needed, microwave again in 15-second intervals. Once smooth, stir in the Biscoff spread until fully mixed. Let it cool to room temperature.
- Add the ganache to the top of each cup and decorate however you like. Just make sure the ganache is no longer warm before adding it. You can serve the cups right away or store them in the fridge for later (I highly recommend letting them chill).

Video
Notes
- Nutrition info is estimated and may vary based on ingredients and portions. For the most accurate details, consider using a nutrition tool or checking our full Nutrition Information Disclaimer.
- Video filmed using Arkon’s Remarkable Creator™ Pro+Plus Mount w/Ring Light (Code Buttercut for $$ off).


Leave a Reply