Only 3 ingredients, no pectin, and adjustable sugar. Use any amount of cherries, I’ll guide you through the amount of sugar for whatever amount you’ve got!
Published: July 16, 2025 by Pamela. Updated on October 3,2025.
This post may contain affiliate links. Please read our disclosure policy.
It’s cherry season, and I was gifted a whole lot of cherries this year. My man hates cherries, so the only right thing to do was turn them into jam so they’d last.
Cherry jam might be one of the prettiest jams out there; smooth, vibrant, and just beautiful in color and texture. Making jam doesn’t take much active time, but with cherries, the pitting definitely tests your patience… unless you’re using frozen ones that are already pitted. I don’t have a cherry pitter, so I used another method you can read about here.
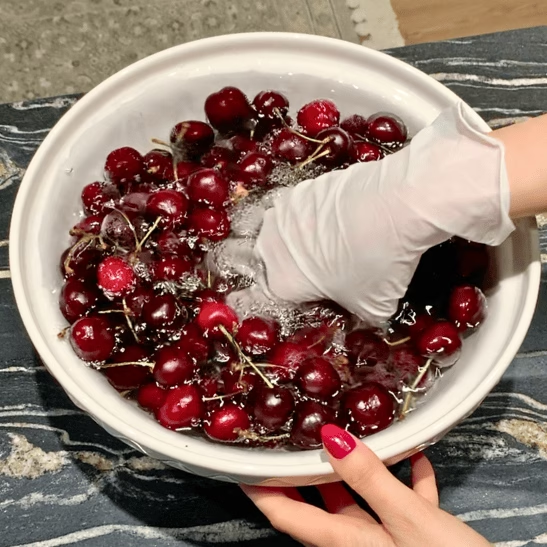
But before you even get to pitting, you’ll need to wash the cherries properly. I show you how I wash cherries in this article!
This jam is fully customizable to your taste and your cherries. The sugar amount depends on how sweet they are and how sweet you want the jam to be. I’ll guide you through it later on!
Ingredients to make Cherry Jam:
- Cherries: You can use sweet or sour cherries, fresh or frozen. Just know that sour cherries need more sugar, and frozen ones release more liquid, so your jam might cook a bit longer. Any variety works as long as they’re pitted.
- Granulated white sugar: Classic for jam-making, it dissolves well and helps the jam set. You can swap it for cane sugar, but it might slightly change the texture and color. I don’t recommend brown sugar here, it can overpower the cherry flavor.
- Lemon Juice: Fresh lemon juice balances the sweetness, helps preserve the jam, and prevents the sugar from crystallizing. Bottled works too, and lime is a fine backup if needed, but honestly nothing tops fresh lemon juice.
Measurements are posted in the recipe card below the instructions.
🍒 Articles you might find useful:
How Much Sugar Should You Use in Cherry Jam?
This recipe is fully customizable, and the amount of sugar depends on how sweet your cherries are and how sweet you want the jam to be.
For every 1 kg (2.2 lbs) of pitted cherries, I use the juice of 1 lemon (about 2 tablespoons, depending on the lemon). So now that we got the lemon juice amount out of the way, let’s discuss the sugar. Adjust the sugar based on taste and sweetness:
- If the cherries are sweet: I would go between 25% and 40% of the amount of cherries in sugar. That means for each 1KG (2.2 lbs) of pitted cherries (without the pit) you add from 250 to 400g of granulated sugar. Just keep in mind that lower-sugar jams might not last as long.
- If the cherries are not sweet: you can go up to 50% sugar, so 500g per 1 kg (2.2 lbs) of cherries. It balances out the tartness.
How to make Cherry Jam (Video)
How to make homemade Cherry jam
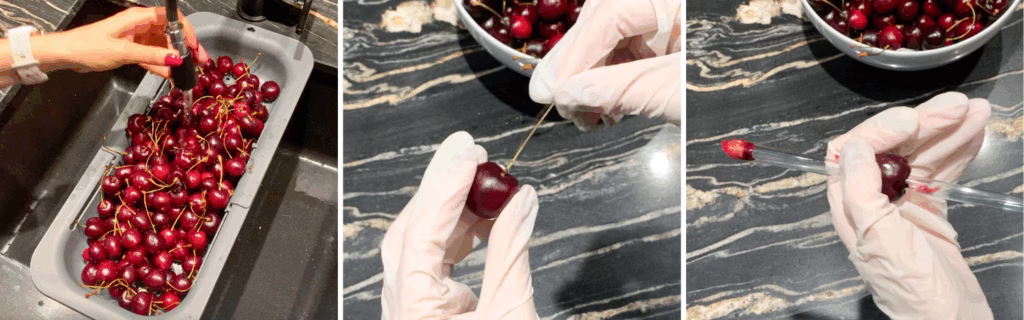
1. Start by washing your cherries. If you want a full tutorial on how to do that, you can check it out here.
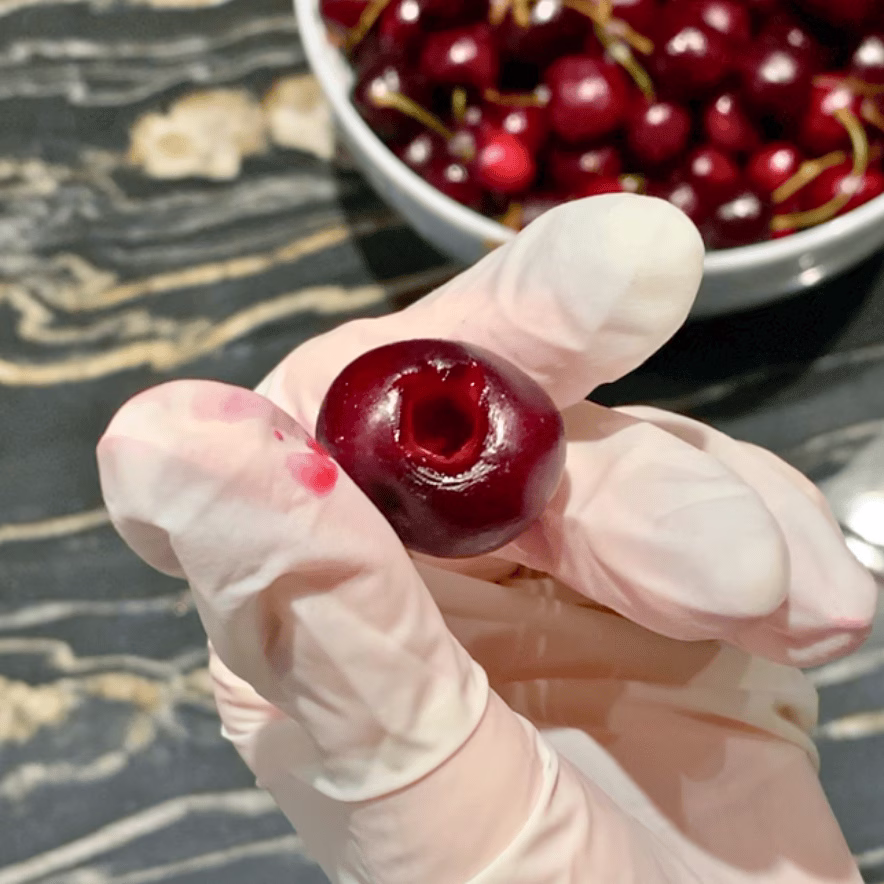
2. The you will need to remove the stems and pits of the cherries. You can use a cherry pitter, or you can use a straw like I did. You can read the thorough article here, or just watch the video in this article I also show you how.
3. After you pit your cherries, you can leave them whole, but I always cut them in half. Cherries tend to hide worms, and I don’t trust them enough to skip this step.
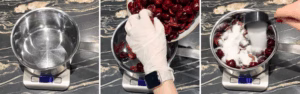
4. Once they’re prepped, weigh the cherries to know how much sugar you’ll need. This is where you apply the percentage based on how sweet your cherries are (you can scroll back to that section if needed). Add the measured sugar.

5. Add the lemon juice and mix everything together.
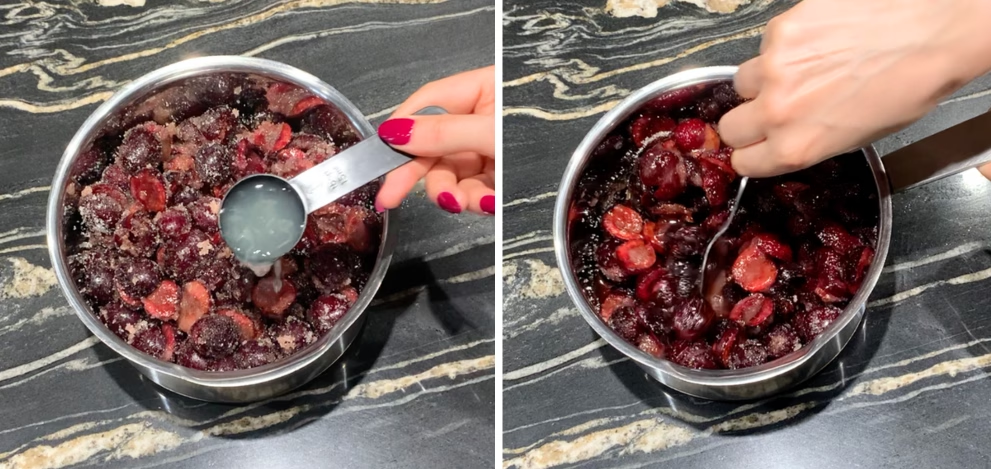
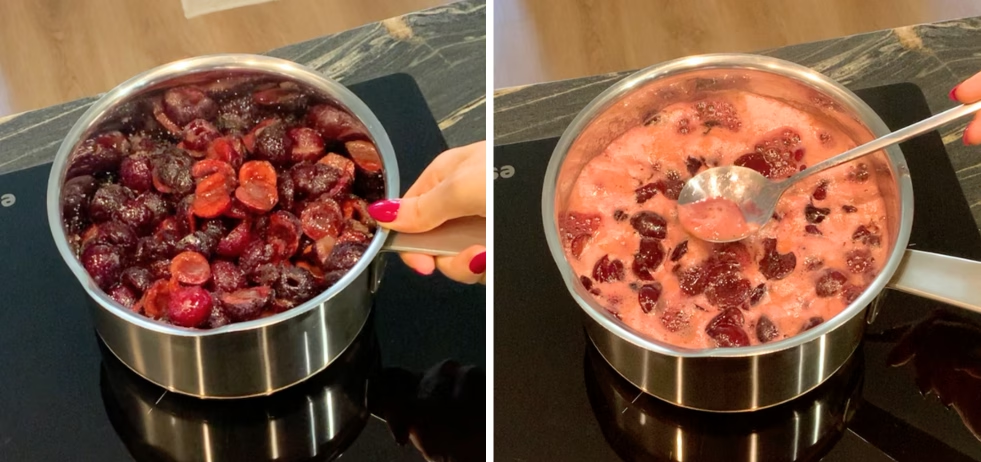
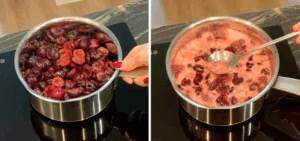
6. Set the pot on the stove over medium heat and bring it to a boil. I like to remove the foam on the top as much as I can but this is totally optional.
7. Now, I wish I can tell you for exactly how long you’ll need to cook it, but that depends on your cherries. The ones I used were super sweet and juicy, and it took me a full 1 hour of boiling to get the right texture.
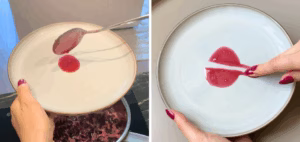
8. Check the jam every 15 minutes and do the cold plate test: Place a small plate in the freezer when you start cooking. When the jam looks close to done, take out the plate, drop a bit of jam on it, and let it sit for 30 seconds. Run your finger through it, if it wrinkles and holds its shape, it’s ready. If it’s still runny, keep cooking and test again in a few minutes.
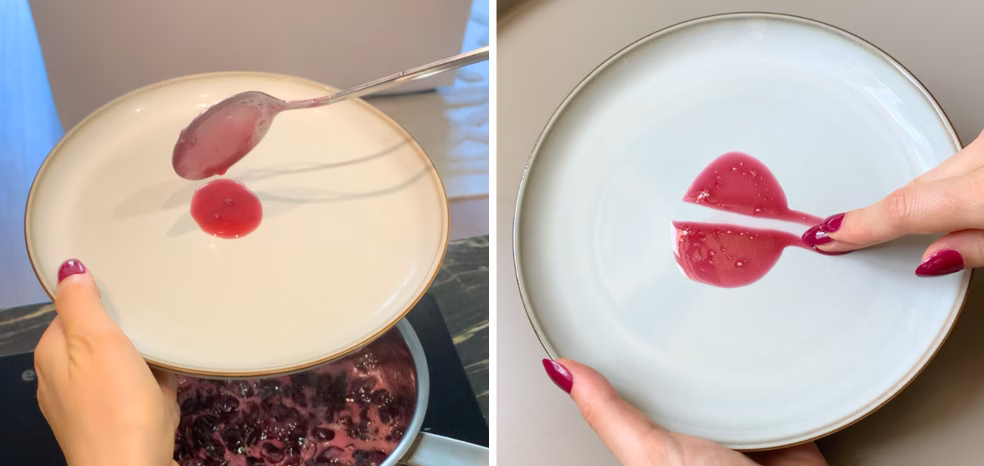
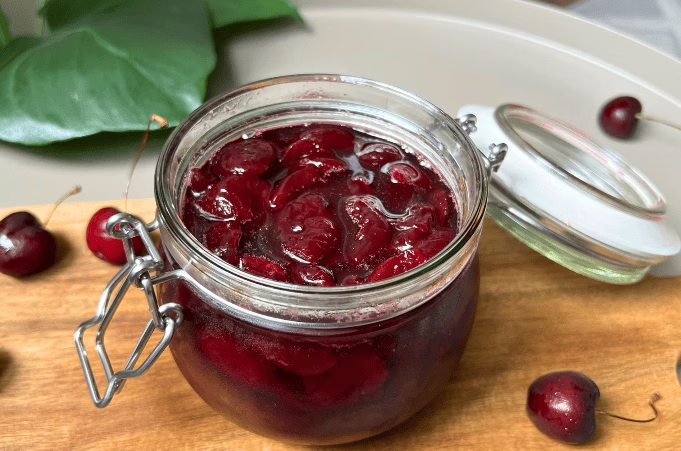
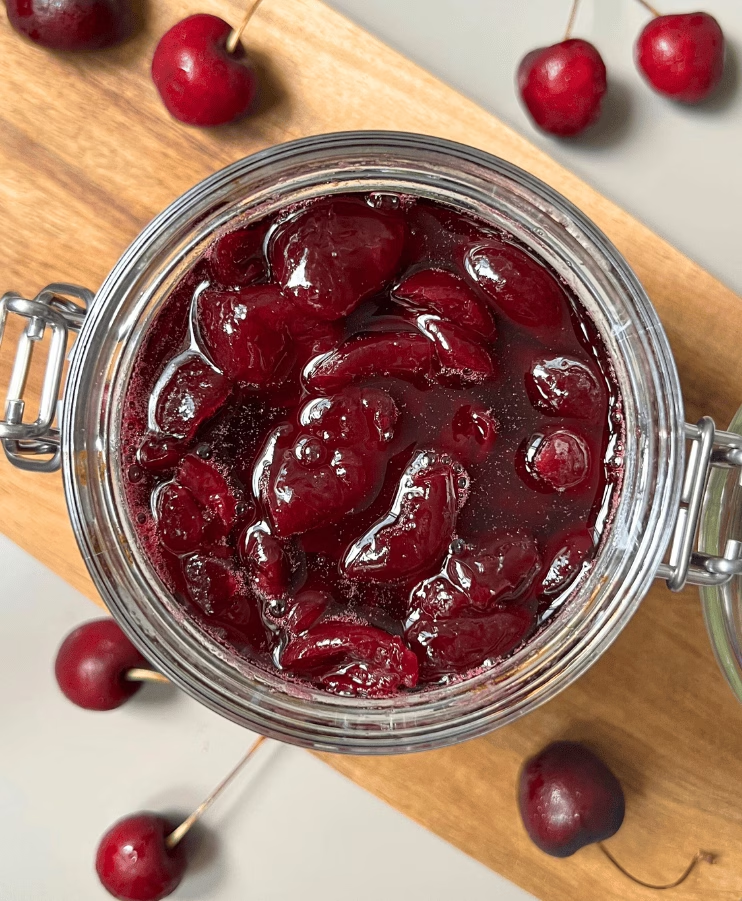
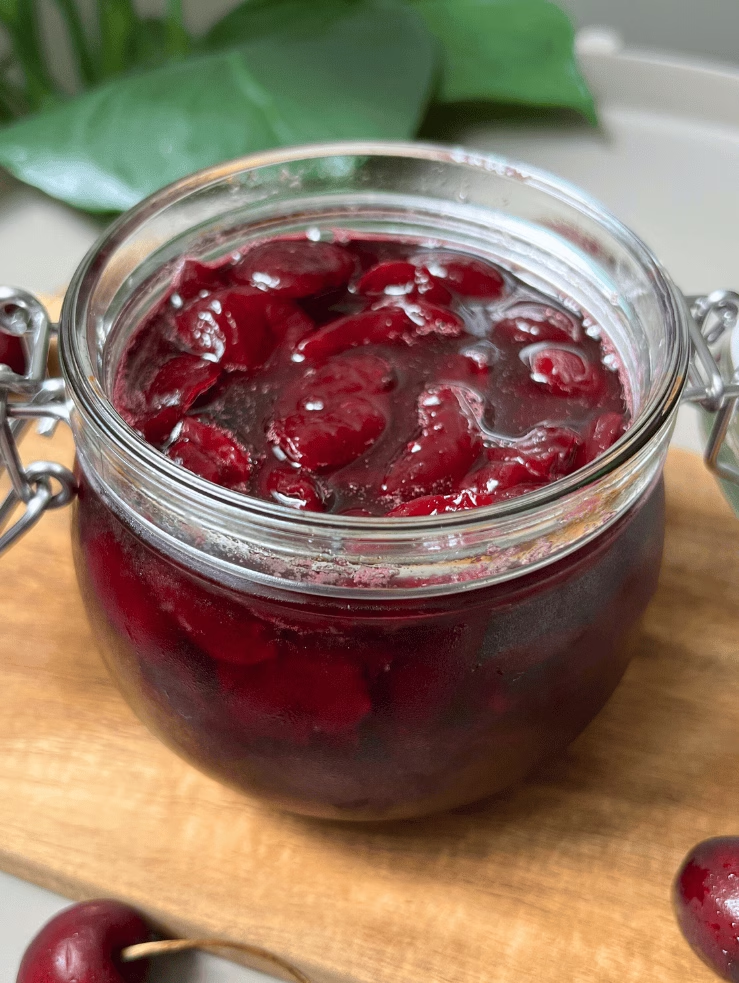
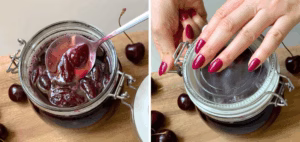
9. Once your jam passes the cold plate test and looks thick and glossy, pour it into a clean, sterilized jar while it’s still hot. Close the lid right away to seal it as it cools. That’s it.
10.Let the jar cool at room temperature.

💡Did you know?
When making jam, it’s better not to use metal utensils like aluminum or copper. These can react with the acid in the fruit or lemon juice and change the taste or color of the jam. It might also damage your pot or spoon. A safer choice is to use wooden, silicone, or stainless steel utensils because they don’t react with the ingredients.
❓Frequently Asked Questions:
Can I use frozen cherries to make jam?
Yes! Just make sure they’re pitted. Frozen cherries may release more liquid, so the jam might take longer to thicken.
Do I need pectin to make jam?
I don’t like using pectin in my jam recipes, I feel like the jam becomes more like jelly which I dislike. The jam will thicken because of the sugar and boiling time so no need to use pectin.
Can I reduce the sugar even more?
You can, but the jam might not set as well or last as long. Check the sugar guidelines in the post before adjusting.
How do I know when my jam is ready?
Do the cold plate test: place a plate in the freezer, then drop some jam on it to check if it wrinkles when you run your finger through it.
Can I whole cherries to make jam?
You can leave them whole, but cutting them helps check for worms.
🫙How to store Cherry Jam:
Unopened Jars (Sealed Properly):
Keep your sealed jars in a cool, dark, and dry place; a pantry or kitchen cabinet works perfectly. Avoid any spots with direct sunlight, humidity, or heat. To make sure the jars are sealed right, press the centre of the lid. If it doesn’t move, you’re good. It’s also important to close the jar while the jam is still very hot. If done properly, the jam should stay good for months.
Opened Jars:
Once opened, your jam should go straight into the fridge.
Try to use it within 2 to 3 weeks to enjoy the best taste and texture.
Freezing isn’t ideal for this kind of jam, it tends to mess with the consistency and make it watery once thawed.
🍒 If you tried this cherry jam recipe, be sure to leave a rating and share your thoughts in the comments below. I’d love to hear your feedback!
Cherry Jam (3 Ingredients)
Ingredients
- 500 g Pitted Cherries (1.1lb – Please read notes below)
- 200 g Granulated Sugar (0.44lb – Please read notes below)
- 1 Tbsp Lemon Juice
Instructions
- Wash and pit the cherries. You can leave them whole, but I cut mine in half to check for worms and make sure they're clean.

- Weigh the pitted cherries to know how much sugar to use. (See notes for sugar percentage based on sweetness.) Then add the sugar.
- Add the lemon juice. Stir to combine.

- Place the pot on medium heat and bring to a boil. You can remove the foam on top if you want but it’s optional.Cook the jam, checking every 15 minutes. The total time depends on how juicy your cherries are, mine took about 1 hour.
- Do the cold plate test: Drop a little jam onto a cold plate, wait a few seconds, then run your finger through it. If it wrinkles and holds shape, it’s ready.
- Pour into a sterilized jar while still hot. Seal immediately and let cool at room temperature. Store in pantry or fridge (you can read the storage section for more details).
Video
Notes
- You don’t need exactly 500g (1.1lb) of pitted cherries. This recipe works with any amount. Just weigh your pitted cherries and adjust the sugar using a percentage.
- For sweet cherries: Use 40% of the cherry weight in sugar. That means for every 1 pound of cherries, use about ¾ cup of sugar (roughly 180g or 6.3 oz).
- For more tart cherries: Go with 50% sugar for better balance.
- For low-sugar jam: You can use as little as 25% sugar, but the jam may not set as firmly and won’t last as long in the fridge.
- The lemon juice stays the same: Use about 1 tablespoon (juice of half a lemon) for every 500g (1.1lb) of pitted cherries. Adjust slightly up or down based on your batch size.
- Don’t forget to taste the cherries first. That will help you decide how much sugar you need.
- Nutrition info is estimated and may vary based on ingredients and portions. For the most accurate details, consider using a nutrition tool or checking our full Nutrition Information Disclaimer.
- Video filmed using Arkon’s Remarkable Creator™ Pro+Plus Mount w/Ring Light (Code Buttercut for $$ off).

Leave a Reply