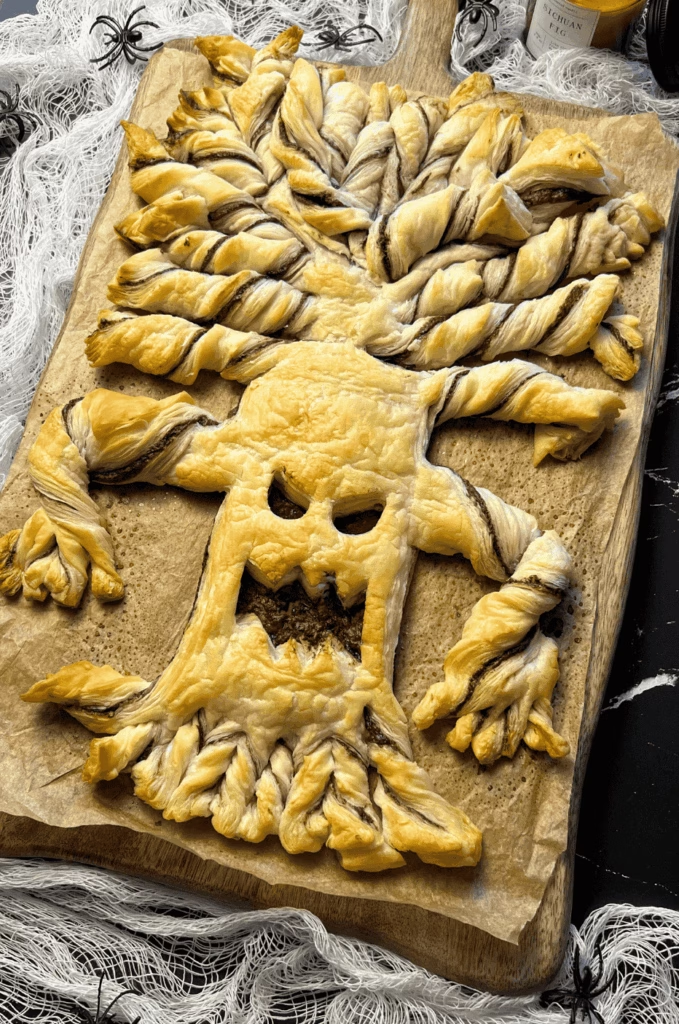
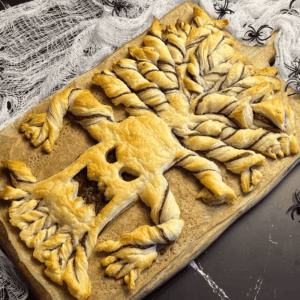
2-ingredient Halloween puff pastry tree made with puff pastry and Nutella. Easy, spooky, and perfect as a Halloween appetizer or dessert.
Published: September 19, 2025 by Pamela. Updated on October 22, 2025.
This post may contain affiliate links. Please read our disclosure policy.
Puff pastry appetizers and desserts are some of the easiest things to make, and this Halloween tree is no different. You only need 2 sheets of puff pastry, or 1 if you want to make a smaller version (you just spread the filling and fold it in half), plus the filling of your choice.
I went with Nutella, but you can make it savory with pesto and cheese, or even use Oreo spread for a darker, creepier look (why did I think of that just now?).
This is a dessert, or appetizer if you go with savory, that I would definitely add to my Halloween table. It adds such a nice look to the table and makes the perfect spooky centerpiece.
Ingredients for Halloween Puff Pastry Tree:
- Puff Pastry Sheets: You need 2 sheets for a full-size tree. If you want to make a smaller version then 1 sheet is enough. I use rectangle puff pastry because it’s easier to shape.
- Nutella: This is the filling I used. You can swap it for pesto, cheese, Oreo spread, or any spread you like depending on if you want it sweet or savory.
- Milk: Brush it on top before baking to give the pastry some color, I like to spray the milk instead to avoid getting Nutella on my brush and spreading it where I do not want it. You can also use egg wash if you prefer (does not work for a spray bottle), but I usually go with milk.
Measurements are posted in the recipe card below the instructions.
How to make an evil tree for Halloween with puff pastry: step by step tutorial
Instructions to make an easy Halloween Puff Pastry Tree:
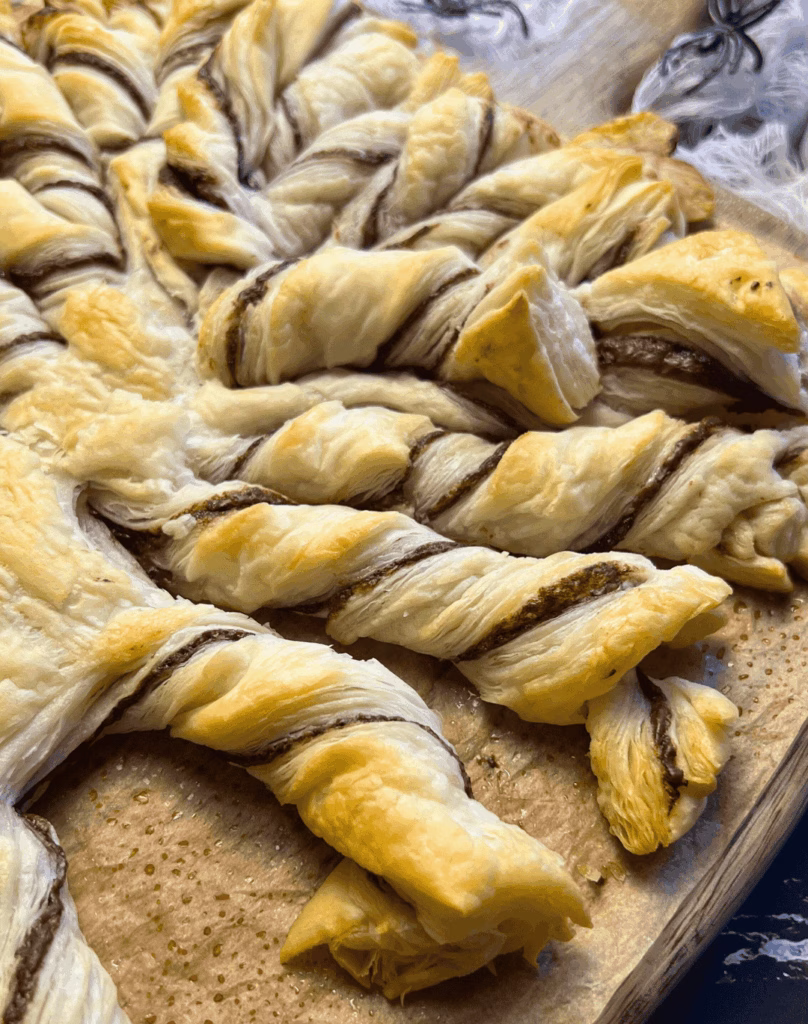
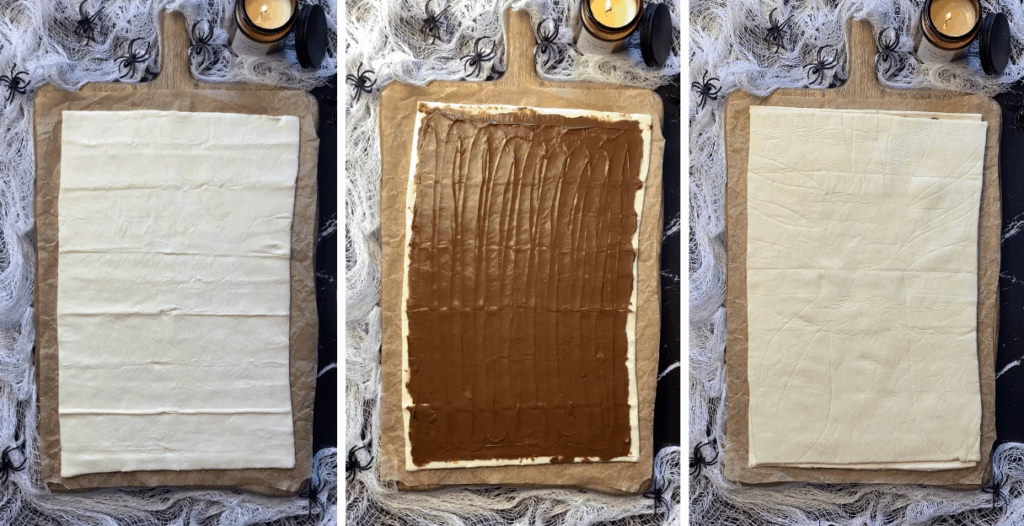
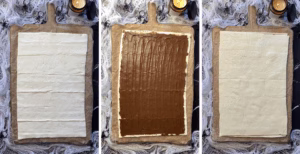
1. Place one puff pastry sheet on baking paper (this step is important so it does not stick, they usually come in one wrapped around them so you can use that). Spread Nutella evenly over the sheet, then place the second puff pastry sheet on top.
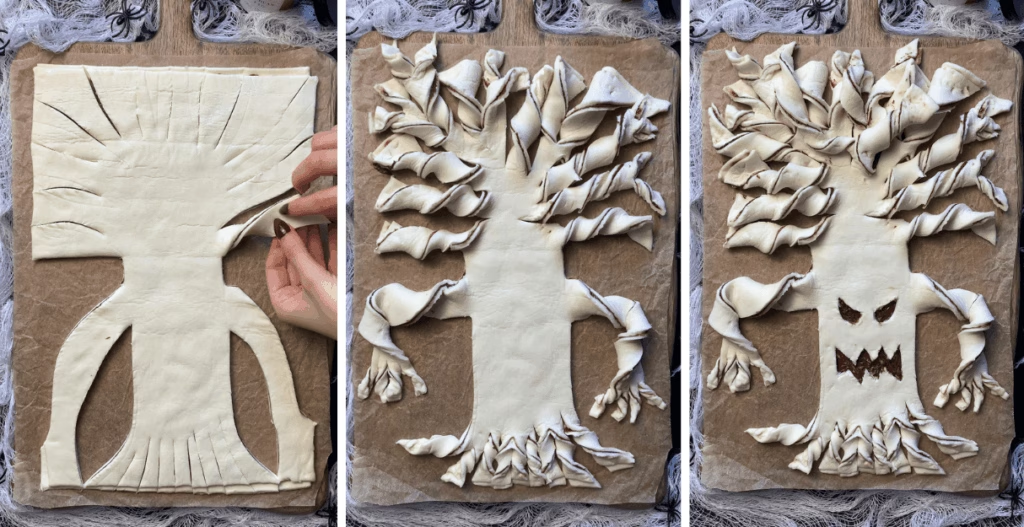
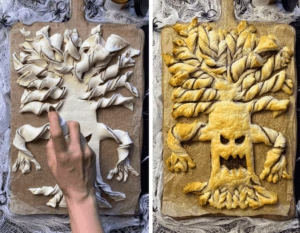
2. Trace out the tree shape before cutting. You can also print an image and use it as a guide. Cut out the tree, twist the branches, and shape the hands. I even added fingers to the hands for extra detail. Try to cut in a way that avoids waste, the strips you cut off can be twisted and added back as extra branches.
3. Spray the tree with milk using a spray bottle, or use a brush of course. Bake according to the puff pastry package instructions, keeping an eye on it. When the pastry is golden on top, it is ready. I baked mine for 20-25 minutes at 200C (392°F).

‼️ Baking Tip for a Perfect Halloween Puff Pastry Tree:
Puff pastry always bakes best when it is cold. If it warms up too much while you are shaping the tree, place it back in the fridge for a few minutes before baking. This helps the layers puff properly in the oven.
Frequently Asked Questions:
Can I make this with just one puff pastry sheet?
Yes, you can make a smaller version using 1 sheet of puff pastry. Just fold it over the filling and cut out a smaller tree shape.
Can I make puff pastry appetizer ahead of time?
You can assemble the tree and keep it in the fridge for a few hours before baking. Make sure you cover it because the puff pastry can dry out. I don’t recommend baking this ahead of time, it is best served hot and fresh.
Can I freeze a filled puff pastry dough?
Yes, but freeze it unbaked. Cover it well so it does not dry out, and leave the milk off until right before baking. There is no need to thaw it fully, just let it sit at room temperature for a few minutes, brush or spray with milk, and bake as usual. If you bought the puff pastry from the frozen section, do not freeze it again, you will need to bake it.

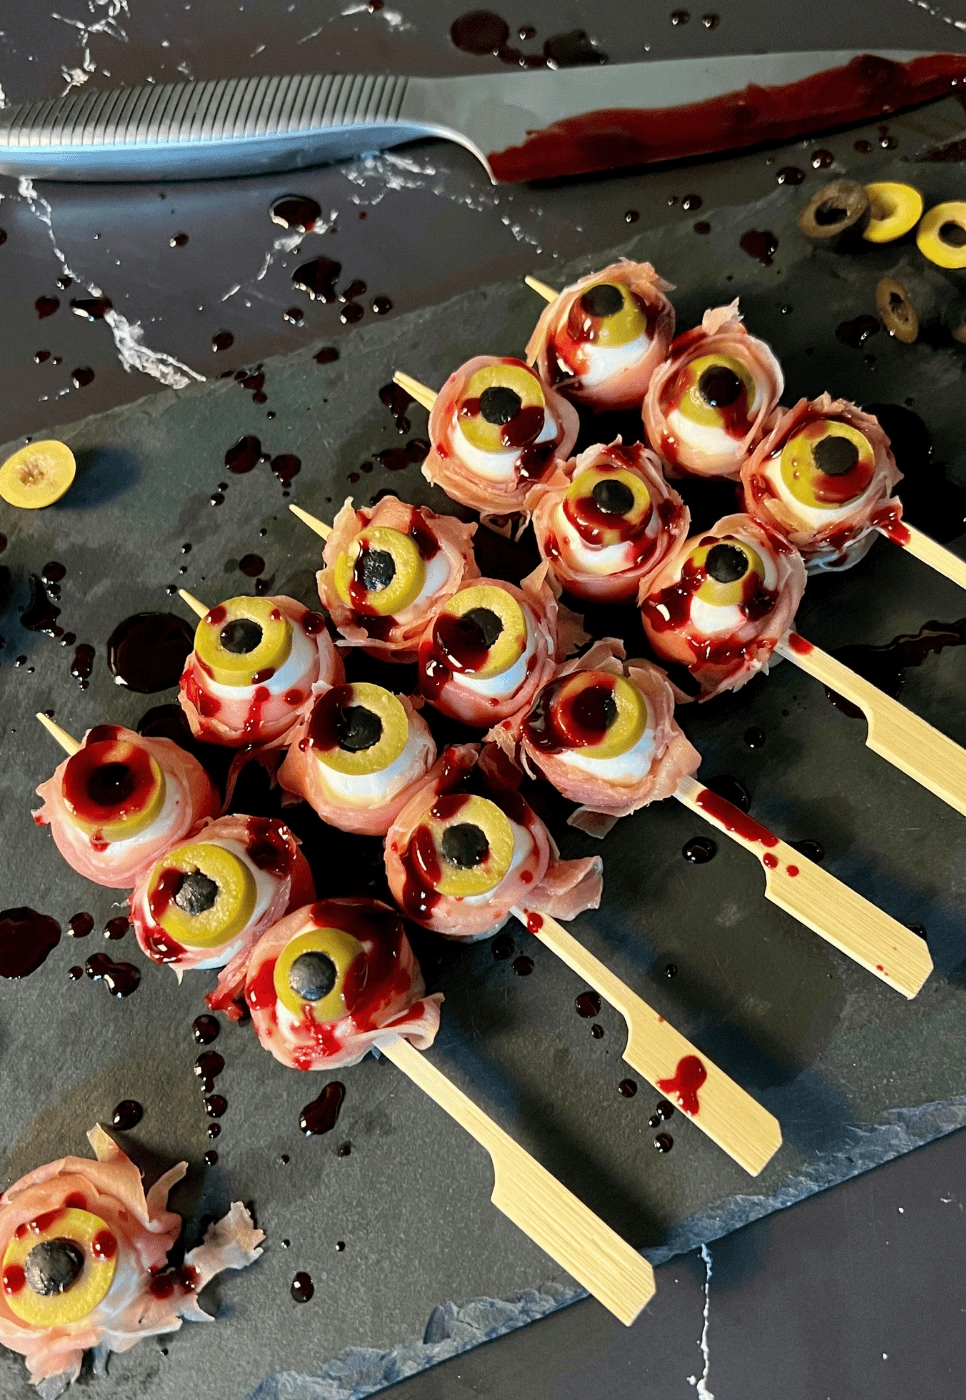
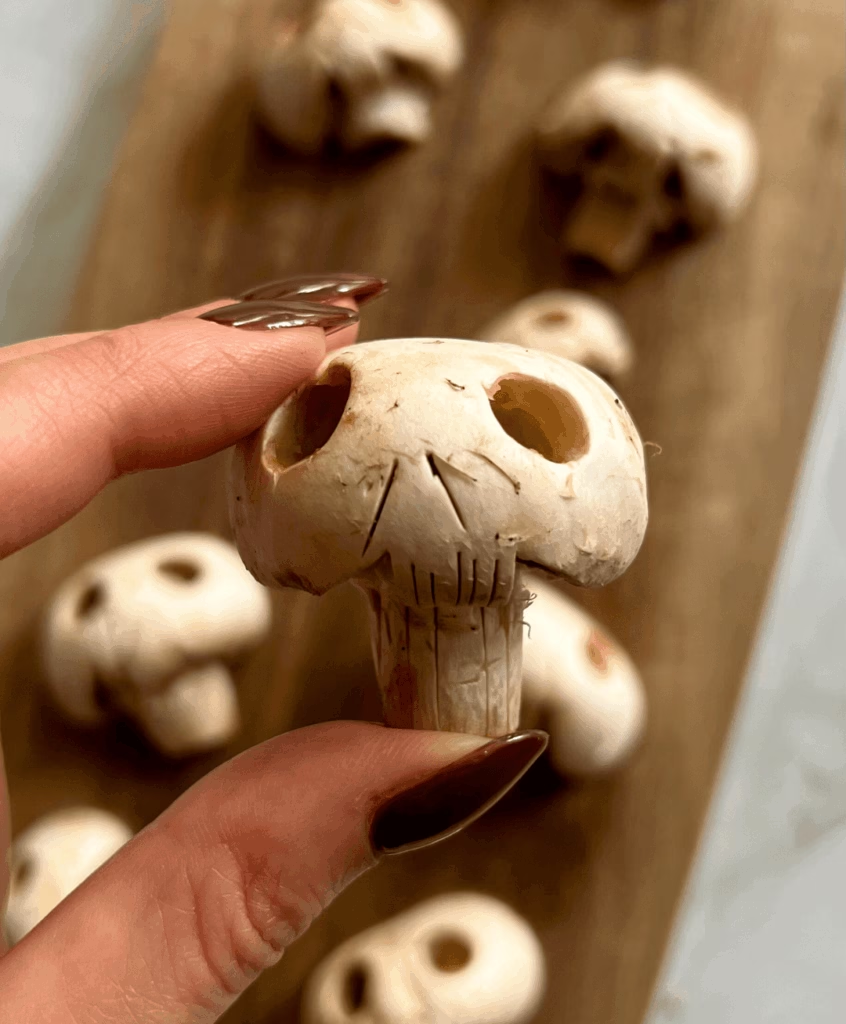
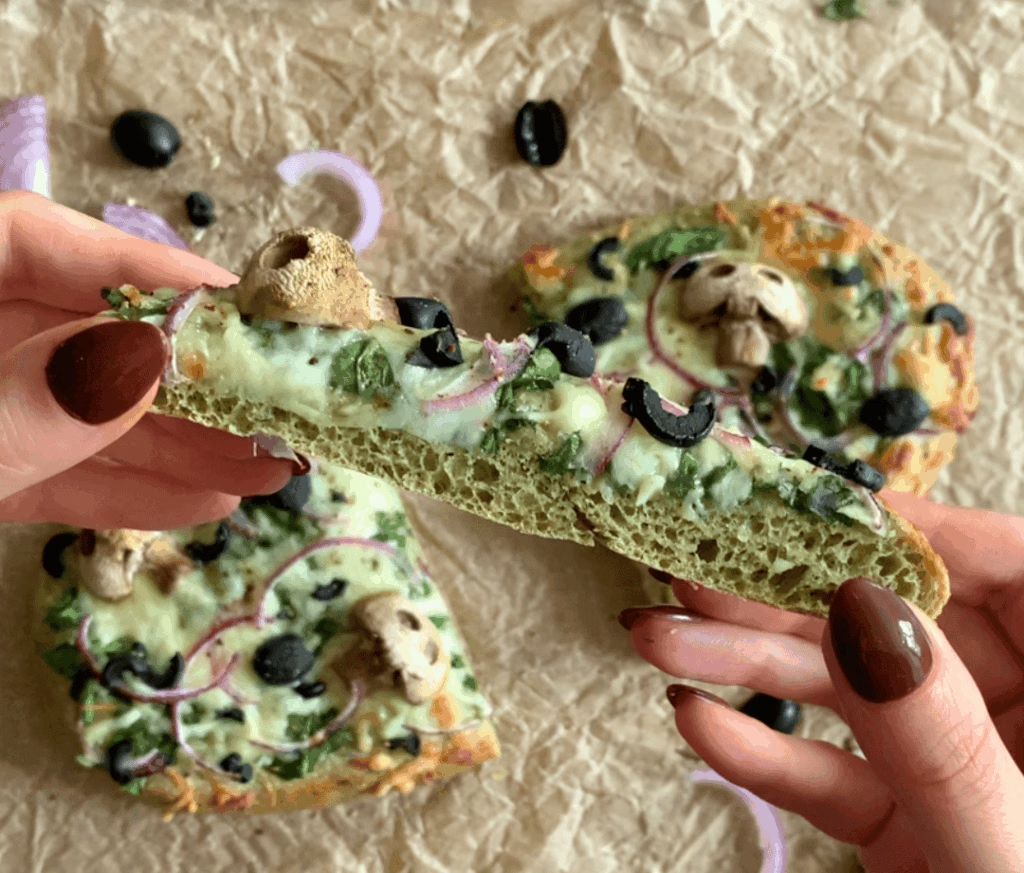
👻 Halloween Recipes You Might Like:
⭐️ If you tried this easy Halloween dessert, be sure to leave a rating and share your thoughts in the comments below. I’d love to hear your feedback!
Nutella Puff Pastry Evil Tree
Equipment
- 1 Knife
- 1 Brush or spray bottle (to brush or spray with milk)
Ingredients
- 2 Puff pastry sheets (I use rectangle)
- Nutella
- 1 Tbsp Milk (For brushing or spraying)
Instructions
- Place one puff pastry sheet on baking paper (this is important so it does not stick). Spread Nutella evenly over the pastry, then place the second puff pastry sheet on top.
- Trace the shape of a tree before cutting. You can also print out a picture and place it on top to guide you. Cut along the outline, twist the branches, and shape the hands. I added small cuts to make fingers. Try to avoid waste when cutting, the extra strips you cut can be twisted and placed back as extra branches.

- Spray the tree with milk using a spray bottle, or just brush the milk on top. Bake following the temperature and time on your puff pastry package. Keep an eye on it, and when the pastry is golden on top, it’s ready. I baked mine at 200℃ (392℉) for 20 to 25 minutes.
Video
Notes
- Nutrition info is estimated and may vary based on ingredients and portions. For the most accurate details, consider using a nutrition tool or checking our full Nutrition Information Disclaimer.
- This recipe makes about 10 servings, assuming each person takes 2 strips from the tree.
Nutrition
📌 Pin this recipe to save it for later!


Leave a Reply