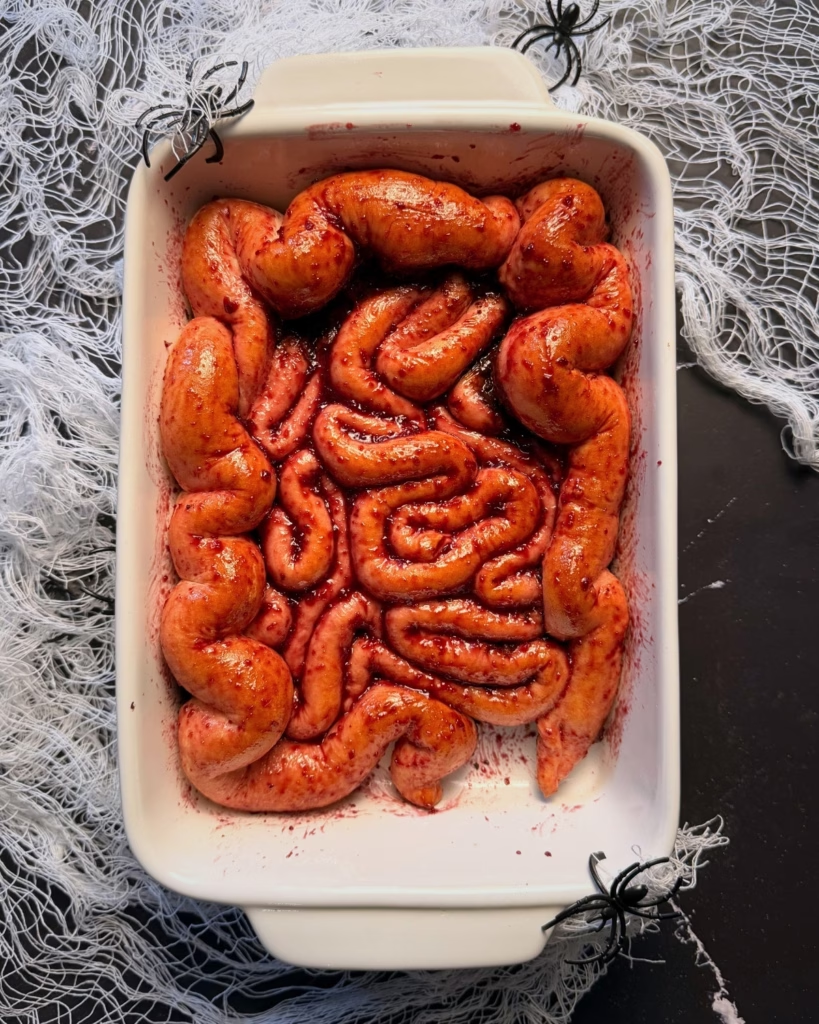
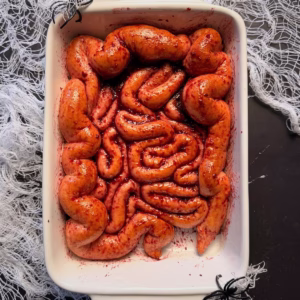
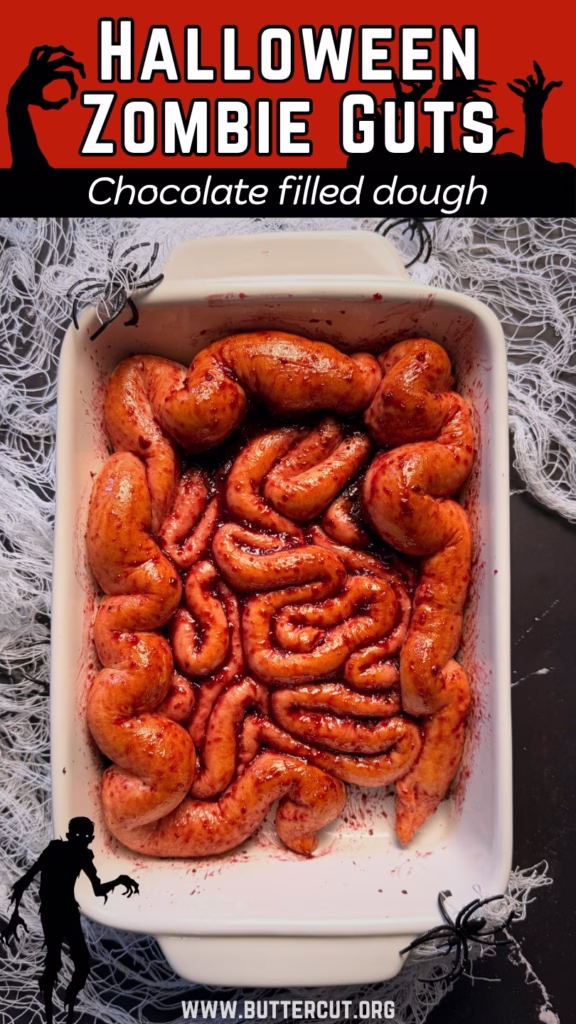
Zombie guts are a creepy-fun Halloween dessert made with a soft pink dough filled with an easy homemade chocolate frosting and topped with cherry jam. They’re spooky, sweet, and surprisingly easy to make. The pink dough gives that realistic “gut” texture while the jam adds the perfect messy touch. It’s the kind of Halloween food that looks terrifying but tastes amazing.
Published: October 24, 2025 by Pamela.
This post may contain affiliate links. Please read our disclosure policy.
Halloween is just around the corner, and I can’t believe this is the last Halloween recipe I’m sharing for 2025. As much as I love creating spooky treats, I’m already getting excited to start working on my Christmas recipes!
These zombie guts are way too delicious for how creepy they look. The dough is the same one I use for my cinnamon rolls (can you believe I shared this before even posting my cinnamon rolls recipe?). I added a little pink coloring to make it look more realistic and filled it with an easy homemade chocolate frosting, you can also use the chocolate frosting I use in my triple chocolate cake recipe. After baking, I finished them with my homemade cherry jam, blended just enough to get that perfect gooey “bloody” texture.
If you love creepy and delicious Halloween food ideas, you would love these recipes I shared:
👉🏻 You can visit the Halloween recipes page for everything I posted.
What you need to make Halloween zombie guts
The ingredients to make this fun Halloween dessert are easy! You need a cinnamon rolls dough, you can go for store-bought if you don’t want to color it, or you can make one at home (it’s super easy). You will also need a filling, I chose a chocolate filling, you can go for something easier like nutella, or anything you like. Finally you need a topping to mimik that bloody texture, I used blended cherry jam, you can also use strawberry jam or even a colored chocolate or regular glaze.
For the dough, you will need:
- Flour: I used all-purpose flour because it gives the rolls a soft and fluffy texture.
- Active dry yeast: The yeast gives the dough that beautiful rise and airy texture. I like to use active dry yeast because I can sprinkle it with all the ingredients and not wait for it to activate.
- Granulated sugar: just a bit to balance the sweetness of the dough and helps the dough rise.
- Milk: I use regular milk 2%, you can use whole milk if you want. The milk needs to be slightly warm, not hot, just warm.
- Egg: Adds structure and richness to the dough. I use a large egg, you can use medium but you might need to slightly decrease the amount of flour.
- Butter: I use unsalted butter to be able to control the amount of salt, I heat it for 30 seconds in the microwave so I have softened butter but not melted.
- Salt: Just a pinch goes a long way. It enhances the sweetness and balances all the flavors.
- Beetroot powder: I used beetroot powder for a natural pink color that makes the “guts” look real, but red or pink food coloring works perfectly too.
A quick and fun video for you
How to make Zombie guts for your Halloween party
1. Make the dough
Add everything to your stand mixer bowl except the butter. Make sure the milk is warm, I usually pop it in the microwave for about 30 seconds. Mix until all the ingredients come together and start to form a dough.
Once it’s mixed, add the softened butter and mix again until it’s fully combined. Then increase the speed to medium and let the mixer knead the dough for about 4 minutes, until it looks smooth and elastic.
Cover the bowl with plastic wrap and a clean towel and let the dough rise in a warm spot for about 1 hour, or until it doubles in size.
2. Make the frosting
Gather all your frosting ingredients and place them in a heatproof bowl. Microwave the mixture for 30 seconds then stir well until everything is melted and smooth.
Once it’s combined, cover the bowl with plastic wrap, making sure the wrap touches the surface of the frosting so it doesn’t form a skin. Refrigerate for about an hour, or until it thickens enough to spread easily.
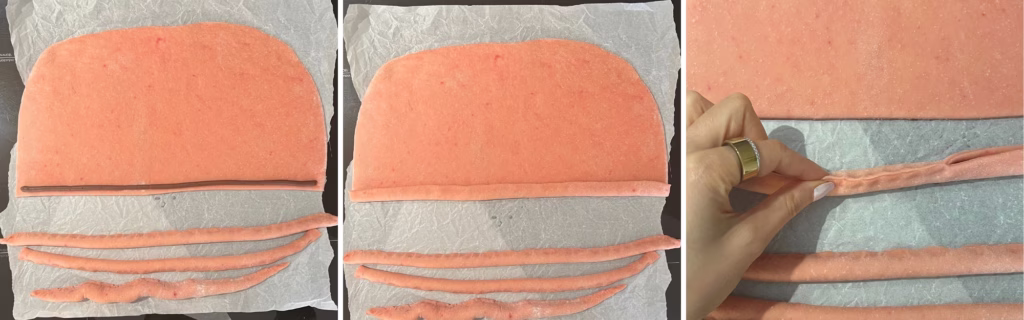
3. Roll the dough and fill with chocolate
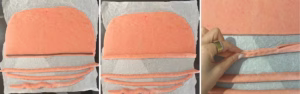
Once the dough has doubled in size, transfer it to a floured surface and roll it out into a large rectangle.
The chocolate frosting is now ready. Give it a quick stir and trasnfer it to a piping bag. Cut the tip of the bag. Now, pipe 1 line of frosting for the small intestine, and 2 lines for the big intestines. The number of each intestine you need depends on how you roll the dough and what dish size you use (I used a 7 by 10 inch which is 18cm by 25cm dish).
When you pipe the frosting, cut the dough and pinch the ends to close the dough.
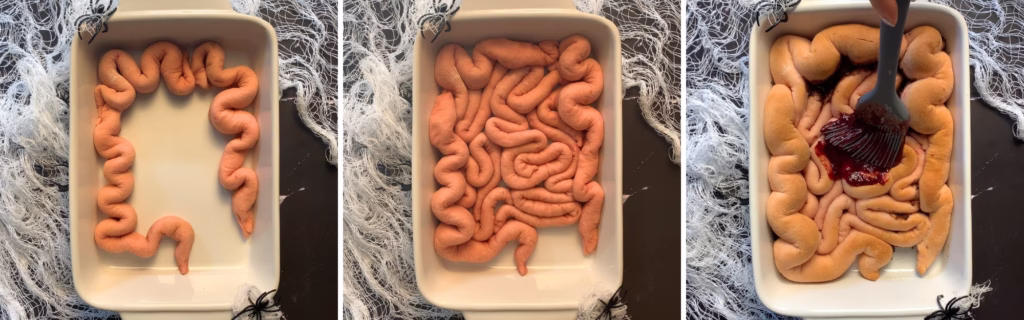
4. Form the guts and bake
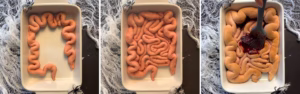
I started with the bigger intestines and placed them on the outer corners then filled the smaller ones in the middle. You can search a drawing on Google to get inspired (that’s what I did).
Once you’re happy with the shape, bake at 180°C (356°F) for 15 minutes or until fully baked. I use fan with top and bottom elements (not broil!) and place the tray in the middle of the oven. I try to preserve the pink color as much as I can.
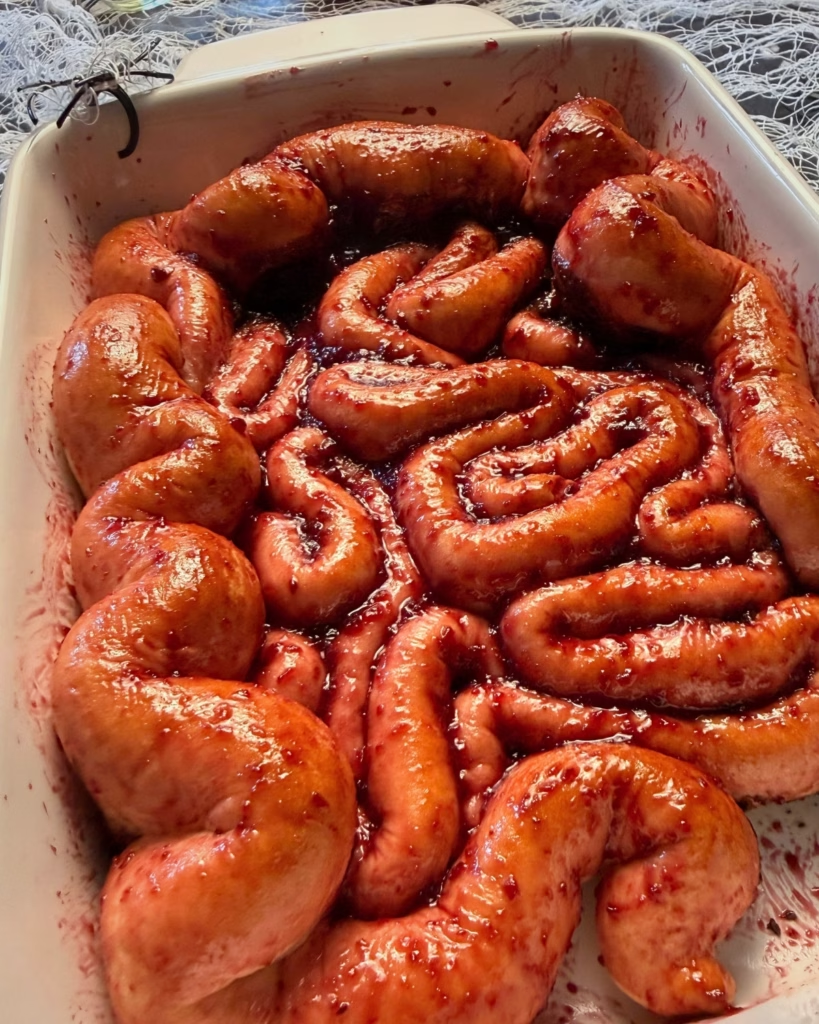
Once fully baked, remove from oven and brush the cherry jam on top or whatever red glaze you are using. Serve and enjoy!
💬 Tried these Halloween zombie guts? I’d love to know what you think! Leave a quick comment or tap the ⭐️ to rate, your feedback helps me keep improving recipes.
Frequently Asked Questions:
Do I have to color the dough pink?
Coloring the dough is optional! But if you want to dye the dough, you can use beetroot powder for a natural dye or any food coloring you have (gel or liquid). Go for pink or red.
Can I make the dough ahead of time?
Yes. Make the dough and let it rise in the fridge overnight. When you want to use it, roll it and fill it but before baking let it rise again for 30 minutes.
What jam should I use for the blood look?
Blended cherry jam and strawberry jam would give the best texture because they have chunks in them but you can make any glaze you like and dye it red.

⭐️ If you tried this Halloween party food, be sure to leave a rating and share your thoughts in the comments below. I’d love to hear your feedback!
Zombie Guts (Halloween Chocolate Rolls)
Ingredients
For the dough
- 1¾ Cups All-purpose flour
- 2 Tbsps Granulated sugar
- ¼ tsp Salt
- 1 Egg
- 1 tsp Active dry yeast
- ⅓ Cup Warm milk
- 1½ Tbsps Unsalted butter
- ½ tsp Beetroot powder (or food coloring)
For the chocolate frosting
- 75 grams Chocolate
- 3 Tbsps Heavy cream (30-35%)
- 1½ Tbsp Unsalted Butter
- 1 Tbsp Cocoa powder
- ½ tsp Vanilla Extract
For the Topping
- Cherry Jam
Instructions
To make the dough
- Warm the milk in the microwave for about 30 seconds. Then add all ingredients to your stand mixer except the butter. Mix until the dough starts to form, then add the softened butter and mix again until everything is combined.Increase the speed to medium and knead for about 4 minutes until the dough looks soft and elastic. Cover the bowl with plastic wrap and a clean towel, then let it rise in a warm place for about 1 hour or until doubled in size.
To make the frosting
- Add all frosting ingredients to a heatproof bowl. Microwave for 30 seconds then until melted and smooth.Cover the bowl with plastic wrap, pressing it directly on the surface, and refrigerate for about 1 hour until the frosting thickens enough to spread.
Roll and fill the dough
- Once the dough has risen, place it on a floured surface and roll it into a large rectangle. Stir the chocolate frosting, then transfer it to a piping bag and cut the tip.Pipe one line of frosting for the small intestine and two lines for the large intestines. The number you’ll need depends on how you roll the dough and the size of your baking dish (I used a 7 by 10 inch which is 18cm by 25cm dish). After piping, cut the dough and pinch the ends to seal it to form rods.
Form the guts and bake
- Start by placing the larger “intestines” around the edges of your dish, then fill the center with the smaller ones. You can look up a quick drawing online for inspiration.When you’re happy with the shape, bake at 180°C (356°F) for about 15 minutes or until cooked through. I use the fan setting with top and bottom heat (not broil) and place the tray in the middle to keep the pink color.Once baked, take it out of the oven and brush cherry jam or your favorite red glaze on top. Serve and enjoy!
Notes
- Nutrition info is estimated and may vary based on ingredients and portions. For the most accurate details, consider using a nutrition tool or checking our full Nutrition Information Disclaimer.
Nutrition
📌 Pin this recipe to save it for later!

Leave a Reply