Learn how to temper chocolate in just a few minutes without a candy thermometer. Easy method using a microwave or double boiler for smooth, shiny results.
Published: June 30, 2025 by Pamela.
This post may contain affiliate links. Please read our disclosure policy.
If you’ve ever tried to make chocolate-covered treats and ended up with dull, dull-looking chocolate (that has white marks) that melts in your hands… chances are, the chocolate wasn’t tempered. Don’t worry though. I’m going to walk you through a super simple way to temper chocolate chips, and you won’t need any fancy tools or equipment.
There’s also a video showing each step, so you can follow along as you go.
Tempering chocolate might sound like something only pros do, when I think about tempering chocolate I immediately think of those professional pastry chefs flipping the melted chocolate on their big surfaces and cooling it down with their spatulas; yeah, we won’t be doing that. The method I’m about to show you is super easy, takes a few minutes, can be done in the microwave, and if you don’t have a microwave it can be done on the stove. I use it all the time for chocolate dipped strawberries, hot chocolate balls, breakable chocolate hearts, and even chocolate bark. The finish is always smooth, shiny, and stays solid at room temperature.
So let’s get into it.
Why Do You Need to Temper Chocolate?
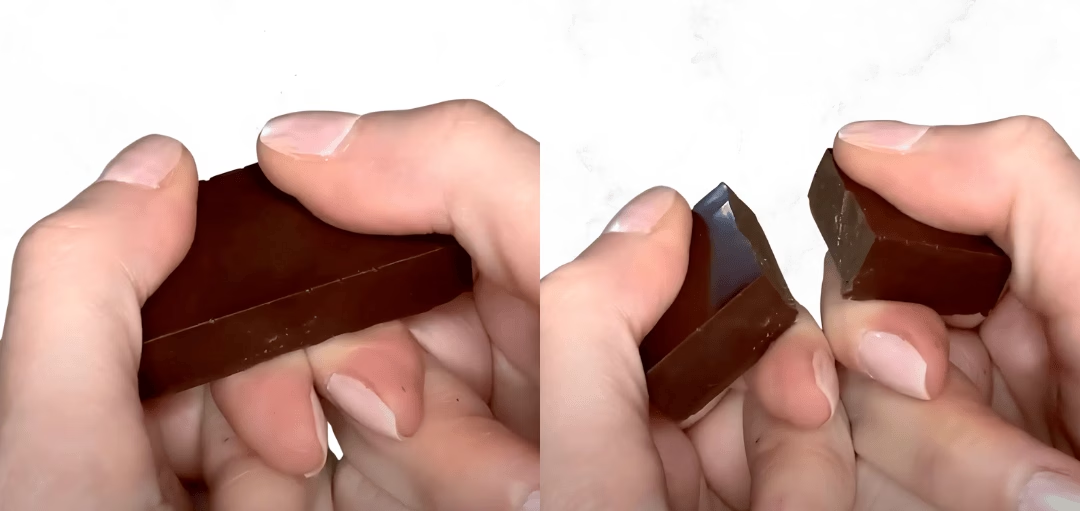
When you melt chocolate without tempering it, it might still taste good, but it won’t set properly. It can look dull, soft, or streaky. This means the minute you hold that chocolate, it will start to melt in your hands. Tempered chocolate, on the other hand, is what gives you that snap when you break it. It looks shiny, sets quickly at room temp, and holds its shape. This is what you want for anything you’ll gift or store outside the fridge.
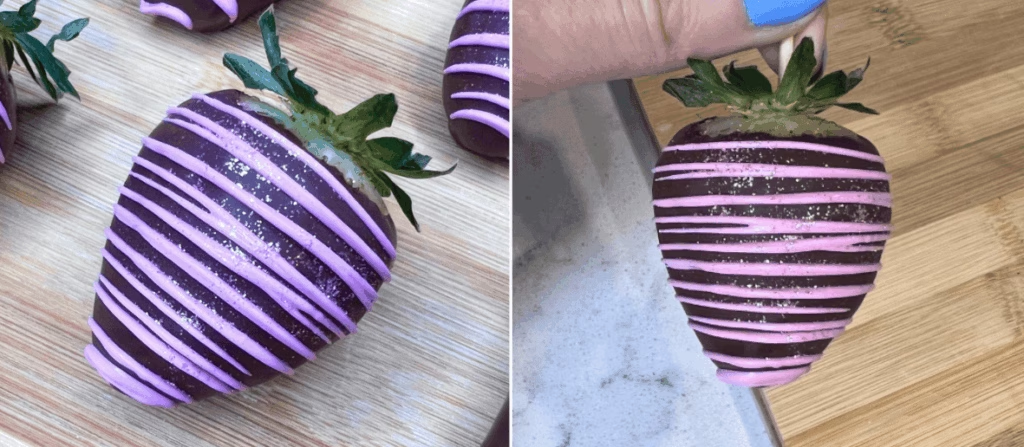
That’s why tempering is a must for chocolate favours, like hot chocolate bombs and dipped strawberries, and especially trends like the Dubai chocolate bar; speaking of which, I have a delicious 2-ingredients Pistachio cream recipe if you want to check it out!
When You Don’t Need to Temper Chocolate:
There are times when tempering isn’t necessary. If you’re making something that will stay in the fridge or freezer, like a frozen dessert or a chilled chocolate shell, you can skip it. The chocolate will set because of the cold, even if it’s not tempered.
Also, if you’re just melting chocolate to mix into a batter or drizzle over something that’s going to be eaten right away, don’t worry about tempering it. The texture and shine won’t matter as much in that case.
An example where I used chocolate but did not temper is to make my Oreo ice cream bars!

Now let’s talk about candy melts, because this comes up a lot.
What Are Candy Melts and Why Don’t They Need Tempering?
Candy melts look like chocolate, but they’re not real chocolate. They’re made with vegetable fats instead of cocoa butter. That’s why they melt easily and set quickly, even without tempering.
You can find them in lots of colors and flavors, and they’re often used for cake pops, chocolate molds, and decorations. Since they don’t contain cocoa butter, they don’t go out of temper like real chocolate does. That’s also why it’s totally fine to melt them all the way through and start using them right away.
I still use a similar method to melt candy melts when I am using them, I believe it gives them a smoother, shinier finish. What I do is pretty simple:
- Place your candy melts in a heatproof bowl.
- Microwave for 30 seconds. Stir well.
- Microwave for another 20 seconds. Stir again.
- Microwave for one more 20-second burst only if needed. Stir again.
That last round depends on how much you’re melting. If you’re working with a small amount, you might not need it. Stirring helps distribute the heat and keeps things smooth.
The goal is to melt them gently so they stay fluid and glossy. No rushing, no overheating. Remember that candy melts can burn too, and when they do, you will have a grainy finish that you won’t be able to fix.
Candy melts are more used for cake pops, cakesicles, and other chocolate treats. They are easier to work with than regular chocolate but chocolate does taste better!

Instructions to temper chocolate without a candy thermometer:
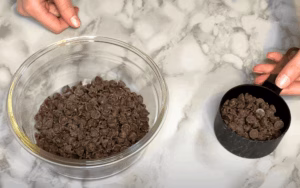
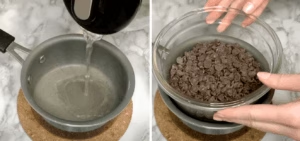
1. Start by dividing your chocolate. You’ll need to set aside 1/3 of the total amount. For example, if you’re using 1.5 cups of chocolate, set aside 1/2 cup and place the remaining 1 cup in a heatproof bowl.

2. You can melt the 1 cup of chocolate using a double boiler or the microwave. In the video, I use a double boiler, but both ways work.
Boil some water and pour it into a pot (you don’t need the pot on the stove). Place your bowl of chocolate on top, making sure the bowl doesn’t touch the water.

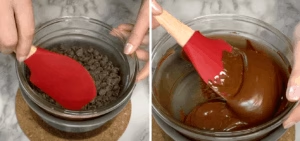
3. Let the steam gently melt the chocolate, and keep stirring until it’s smooth.

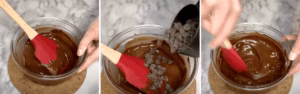
4. When the chocolate is melted, remove the bowl from the pot. Now it’s time to add the chocolate you set aside earlier (the 1/2 cup). Add a small amount at a time, stirring until it melts. Keep going, adding little by little.
You’ll notice it starts to melt slower as you go, and that’s what you want.

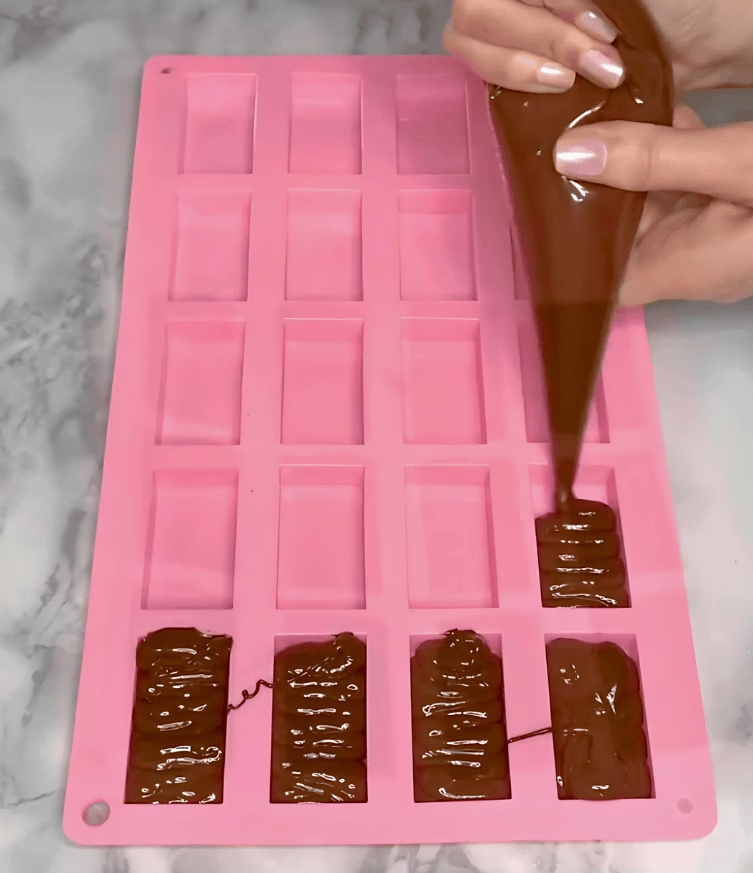
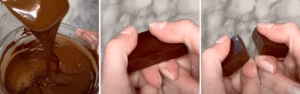
5. Once all the chocolate is added and fully melted, your chocolate is tempered and ready to use. You can pour it into molds, dip strawberries, make bark, or whatever else you have in mind.

Want to temper chocolate in the microwave instead? Here’s how:
1. Place the 1 cup of chocolate in a heatproof bowl.
2. Microwave it in short bursts:
– Start with 30 seconds, then stir
– Next, microwave for 20 seconds, stir again
– If needed, do another 20 seconds, and stir until smooth
(You might not need the last round depending on how much chocolate you’re using. The key is to melt it gently and keep stirring).
3. Once melted, take it out of the microwave and start adding the 1/2 cup of chocolate you set aside earlier. Just like the double boiler method, add it a bit at a time and stir to melt.
You’ll notice that it melts slower the more you add, that’s a good sign. When it’s all fully melted, your chocolate is tempered and ready to use.

How Do You Know your chocolate is tempered?
Once your chocolate is tempered and you use it, it should start setting within a few minutes at room temperature. It will look smooth, have a nice shine, and won’t feel soft when you touch it.
Can you fix untempered chocolate?
Yes, if your chocolate did not temper well, you can still fix it; here’s how:
- Re-melt it gently using the same method you used before, double boiler or microwave.
- Once fully melted, let it cool slightly for a minute or two.
- Then, restart the tempering process by adding fresh chopped chocolate or chips (about 1/3 of your batch), little by little, while stirring.
That will help bring the chocolate back into temper. Just remember to keep it away from any moisture, don’t overheat it, and stir often.
You can also save untempered chocolate for baking, fillings, ganache, or drizzle; it’s still totally usable.
If you tried this method, be sure to leave a rating and share your thoughts in the comments below. I’d love to hear your feedback!

How To Temper Chocolate Without a Candy Thermometer
Equipment
- 1 Heatproof Bowl
- 1 Pot (No need if you're using the microwave method)
- 1 Spatula or spoon
- 1½ Cups Chocolate (I used chocolate chips)
Instructions
Double Boiler Method
- Set aside ⅓ of your chocolate. If using 1½ cups, place ½ cup aside and add 1 cup to a heatproof bowl.
- Pour boiling water into a pot (no need to place it on the stove) and set the bowl on top. Make sure the bowl doesn’t touch the water.
- Stir until the chocolate fully melts, this will take a few minutes because the pot is not on the stove and we are relying on the boiled water.
- When the chocolate is fully melted, remove it from the bowl from the pot. Add the remaining chocolate little by little, stirring well and allowing the chocolate to melt between each addition.
- When all the chocolate is melted and smooth, it’s ready to use.
Microwave Method
- Set aside ⅓ of your chocolate. For 1½ cups, keep ½ cup aside and place 1 cup in a heatproof bowl.
- Microwave for 30 seconds, stir, then microwave for 20 seconds and stir again. Repeat one more 20-second round ONLY if needed.
- Once melted, add the rest of the chocolate gradually, stirring between each addition until fully melted.
- When the mixture is smooth and shiny, your chocolate is tempered and ready to use.


Leave a Reply